Google Cloud Server Setup
For full Website content visit The Diabetic Way.
Nightscout on Google Cloud
⌁
Credit too:Big thanks go to jamorham, the current xDrip head developer, for the idea, putting it together, implementing the installer, and testing everything with myself and Navid doing the documents with myself Dave!.
If you already have a working Nightscout site working, there is no rush to switch to this yet.
It is still in testing stages and improving this if we can. It’s not fully finished yet, but on my testing it seems ok butI was not able to use AndroidAPS with it as of yet!
I have not fully tested this so please let us all know how you go on with it! Thanks!
Upcoming changes made: Added Terminal Process:old heroku accout to it.
So with all that, let’s set up a free account on Google Cloud
⌁
1. Noip Account⌁
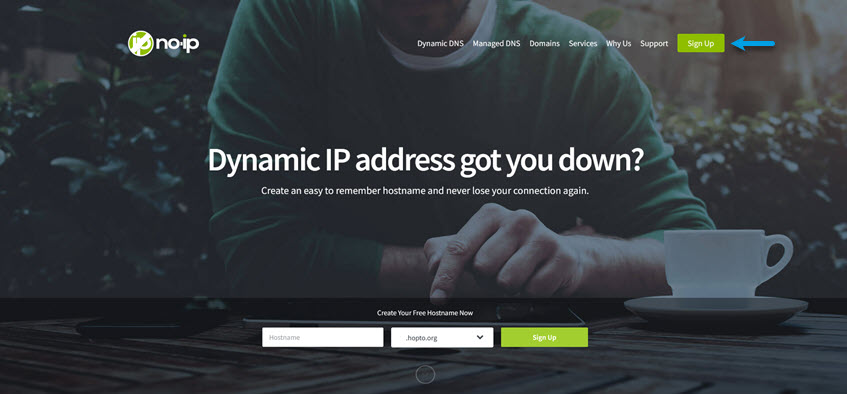
a. First Sign up Noip: By going to https://www.noip.com/ or Noip⌁
b. You need to enter your email address, choose a password, and choose a hostname. Make a note of all of it.test
⌁
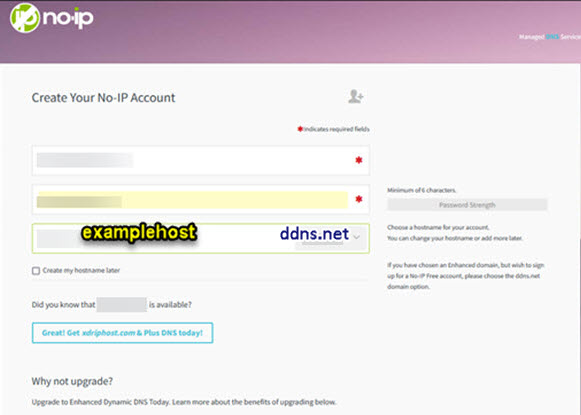
c. Select the “Free Sign Up” not the “Get Enhanced”.
⌁
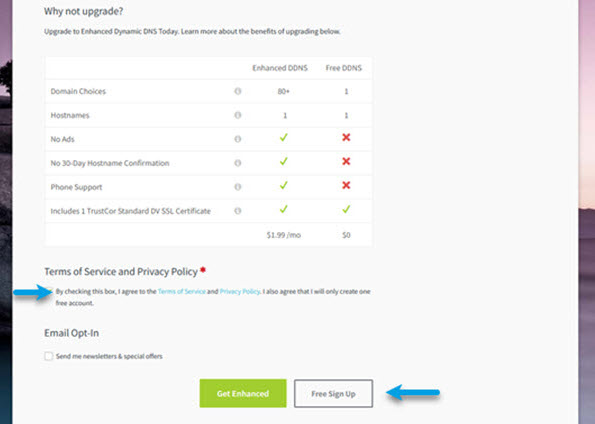
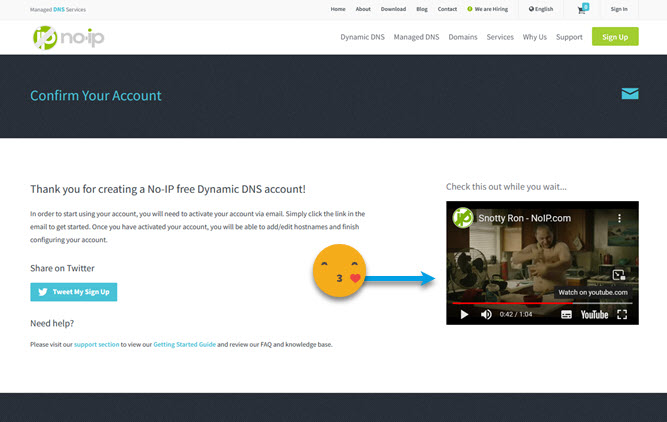
d. Sit back have a cuppa and enjoy video waiting for your email to “Confirm Account” before you advance to the next section.
⌁

e. Host Name⌁
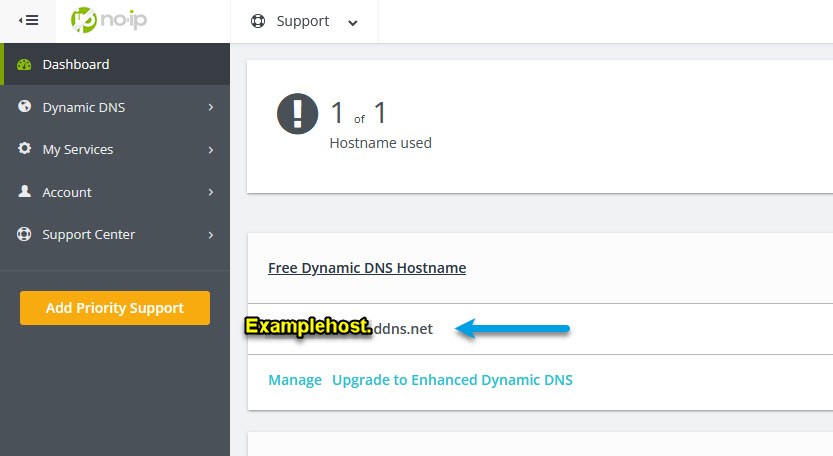
You will be given a Hostname, that you will use to go to your nightscout site later and also add it to your settings and other things like when you setup a Follower. I will show you an example Host below.
2. Google Account⌁
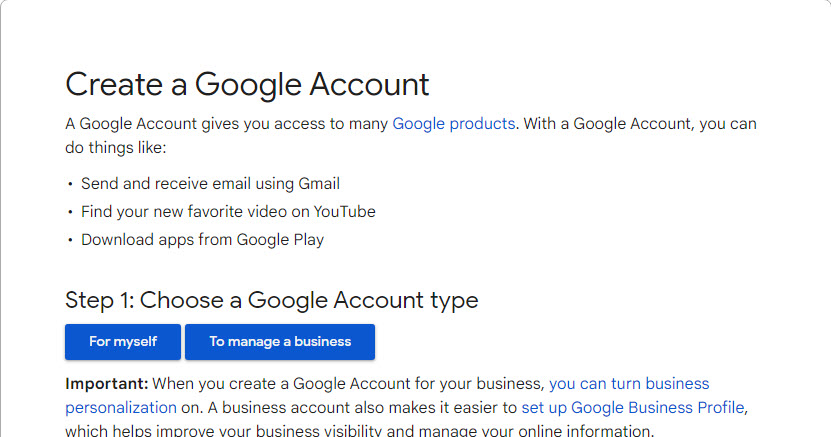
a. You need a Google account to proceed. If you do not have one go to https://support.google.com/accounts/answer/27441?hl=en and sign up or Google Account⌁
Once you have created a Google account
Go to
3. Google Cloud
⌁
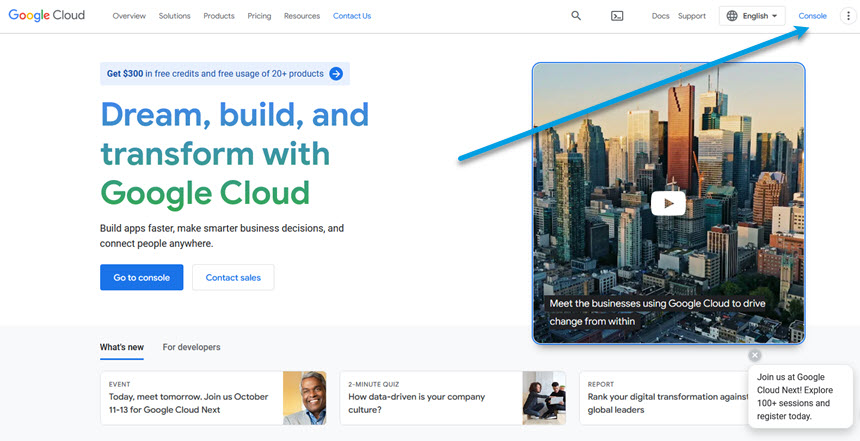
Google Cloud console, and sign in with your Google Account
a. Make a new project
⌁
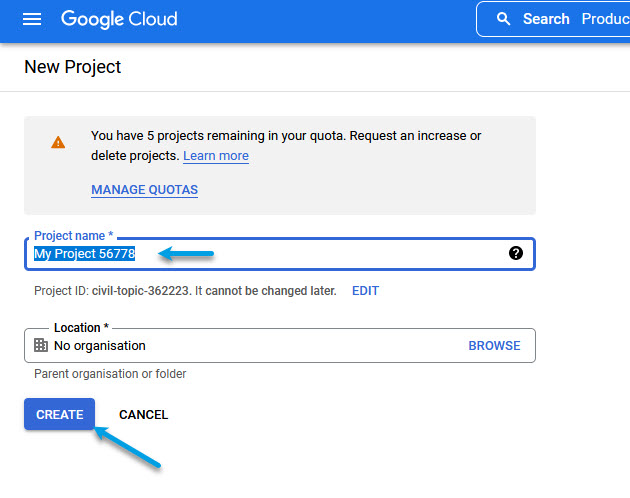
Give it a name and click create.
b. Select your new project.
⌁

c. Select the dashboard.
⌁

d. Select the Compute Engine.
⌁
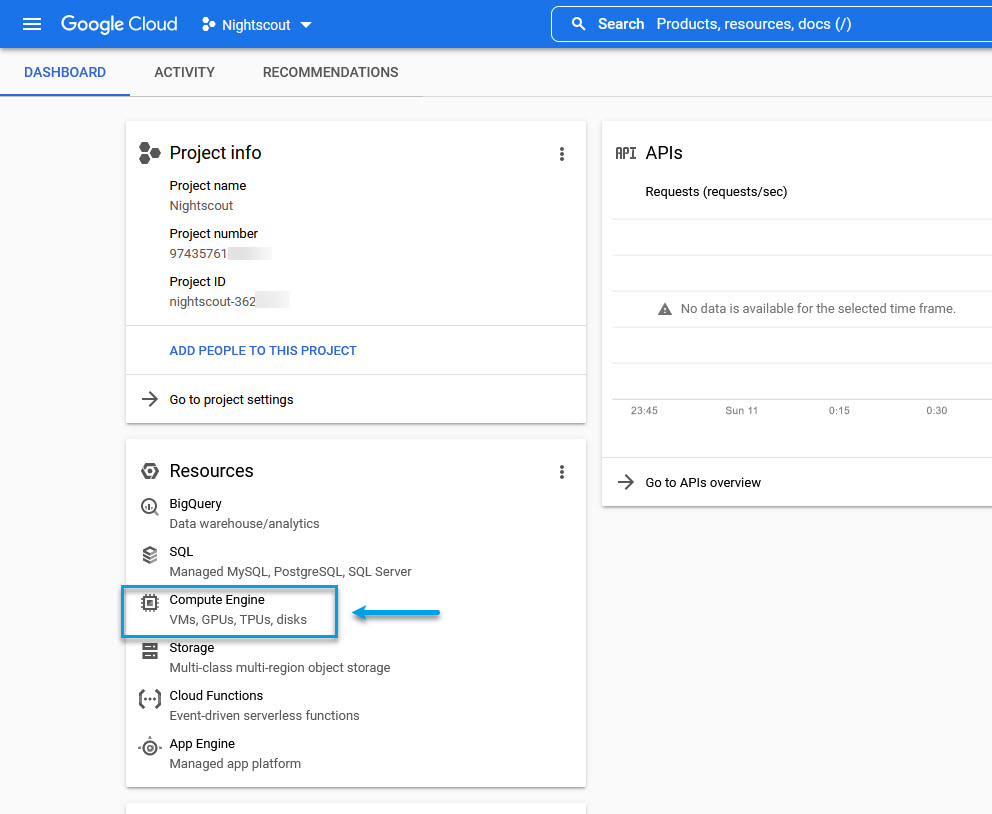
This next section is where we need to go through settings to get a free Tier from Google. You can view the specifications we will be needing to fulfil are Task.
e. Select Enable which you wil have to do billing process twice!
⌁
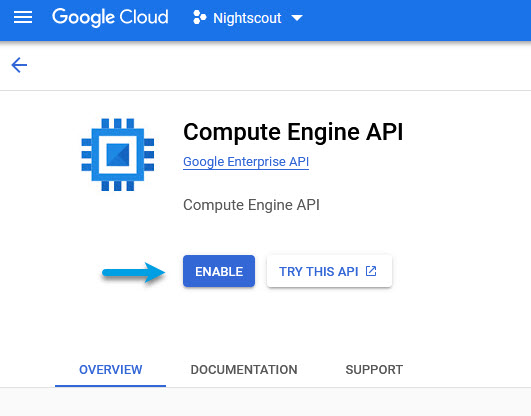
f. Select Enable Billing which will take a while!
⌁

g. Go to Google Cloud or https://console.cloud.google.com/ Enable the engine again. It will ask you to enable billing again. But, this time, select the billing account you just created.⌁
Enable billing for your new project.
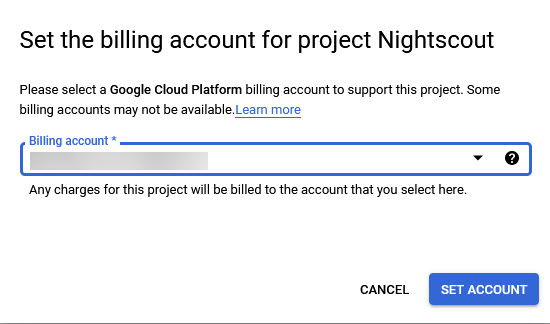
h. Free Tier virtual machine Spesifications you need to pick Free Tier Specifications to see the Specifications: Or go to https://cloud.google.com/free/docs/free-cloud-features#free-tier I will give you the settings below is what I picked from the specifications list. For you to select in the next process you need to do. see Section 14. below now.
⌁


The above three regions are the regions your virtual machine can be located, not where you have to be in living. In other words if you live in the U.K you still need to pick one of the three above. Oregon. Lowa, or South Carlolina to get a free Tier

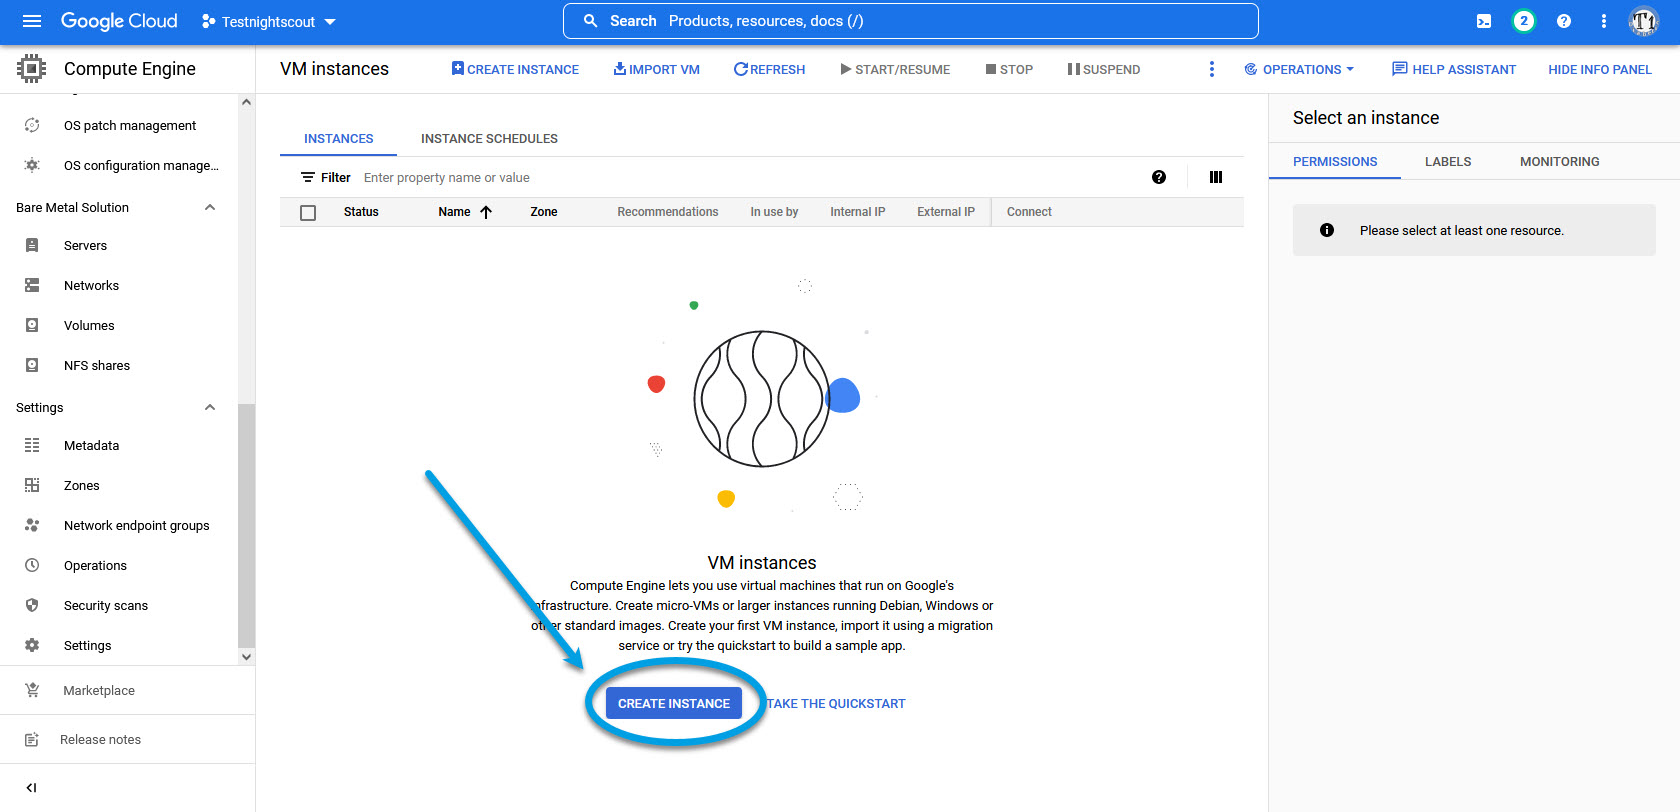
i. Process you need to do now ** Go to the dashboard. Select “Compute Engine”. Select the “VM instances”** tab in the left pane if it’s not already selected.⌁
Select “Create Instance”.
j. Settings you need to fill in Now:⌁
1. Set name to “nightscout”.⌁
2. Set machine type to “e2-micro 1GB”.⌁
3. Select a region that qualifies for free tier.
⌁

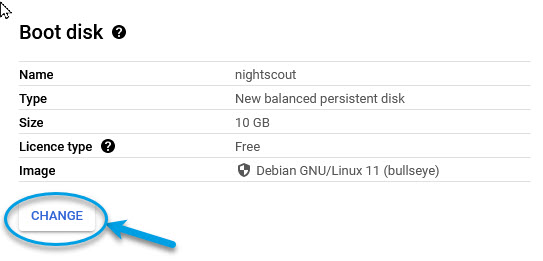
k. Go Down to Boot Disk Section :⌁
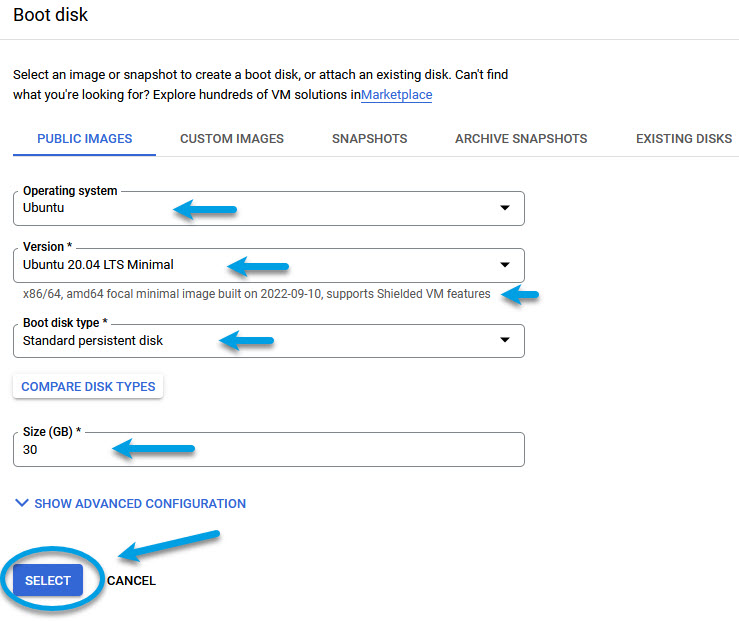
Edit it by clicking on change “Boot Disk” and modify as shown below. Click on “Select”.
1. Ubunta.
⌁
2. Ubunta 20.04 LTS Minimal.
⌁
x86/64, amd64 focal minimal image built on 2022-09-10, supports Shielded VM features
3. Standard Persistance Disk
⌁
4. 30GB
⌁

Click on “Select”.
l. **Under the firewall Section, **⌁
a. enable both http and https.
⌁
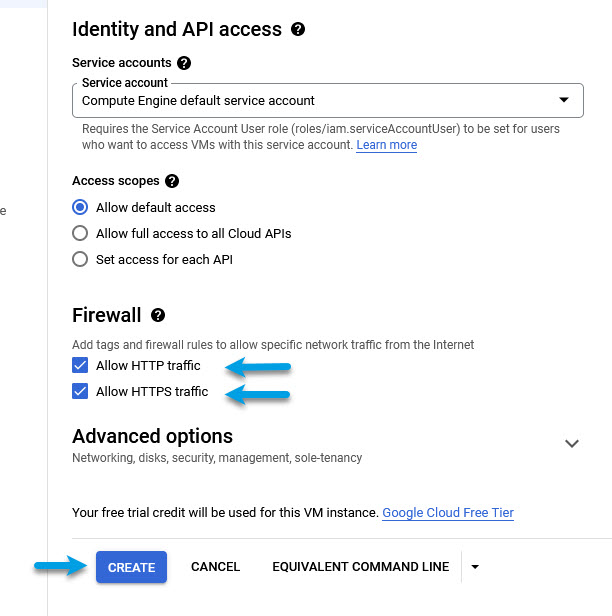
m. Click on “Create” to start creating the virtual machine. Google will now bring up your virtual machine after its finished which will take a while, so sit back and relax.
⌁

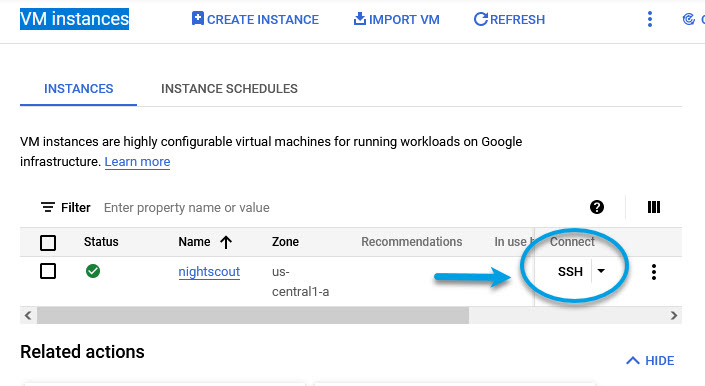
n. After the external IP address column is finished, click on “SSH” on the right side of the IP address. A terminal will appear shortly.
⌁
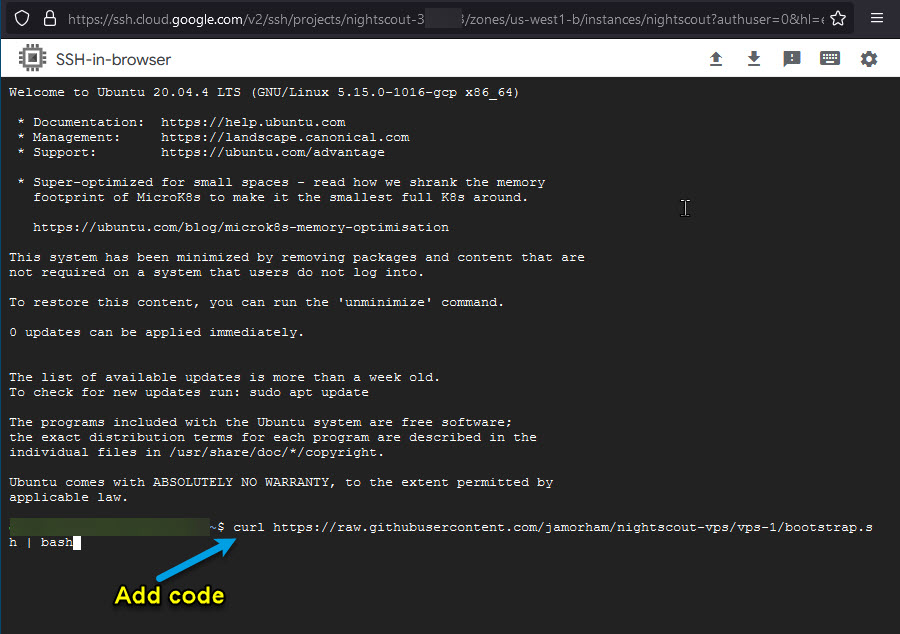
o. Copy and paste the following line into the terminal window that has just come up. Be very cautious not to copy it into any other machine as it will overwrite the contents of the machine. Copy the code below into teh teminal.⌁
curl https://raw.githubusercontent.com/jamorham/nightscout-vps/vps-1/bootstrap.sh | bash
You might get a pop up preventing you from opening the terminal window. If you do, select the options and allow the popups window. Then select the SSH again to open it.

4. **Now Wrap up Linux installation **
⌁
a. If you get an error message that says (EINTEGRITY) ending with (0 bytes) and it hangs, just press CTRL and C keys at the same time to interrupt. Then, re-run the curl bootstrap command above that you have just entered into it again. You can use the up arrow on the terminal to go back to the previous command entries.
⌁
b. After the installation is finalized, you will be asked to login. To log into the virtual machine, use the email address and password you used to register from when you did your Noip Account
⌁
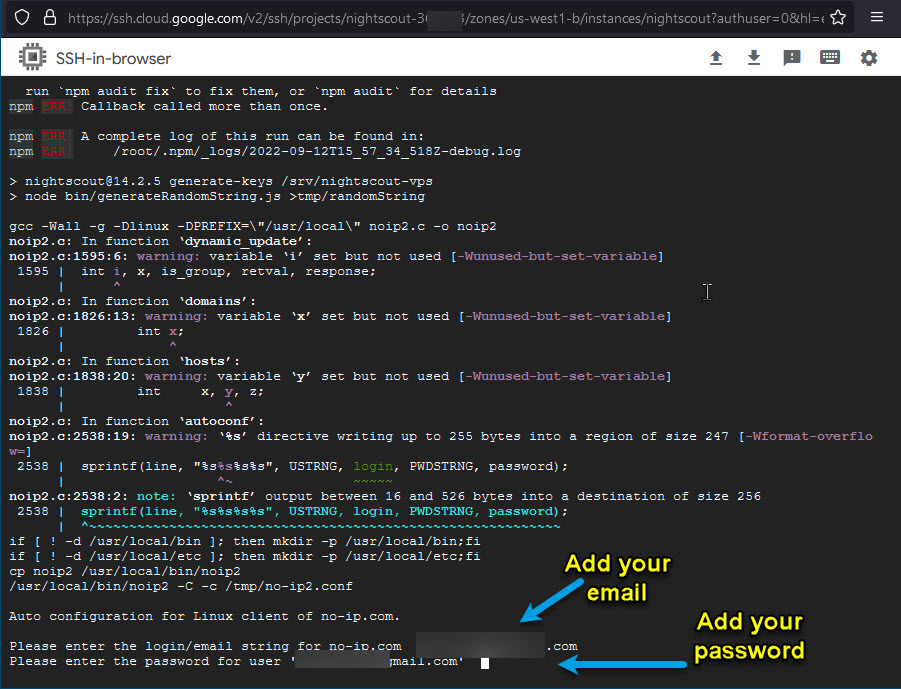
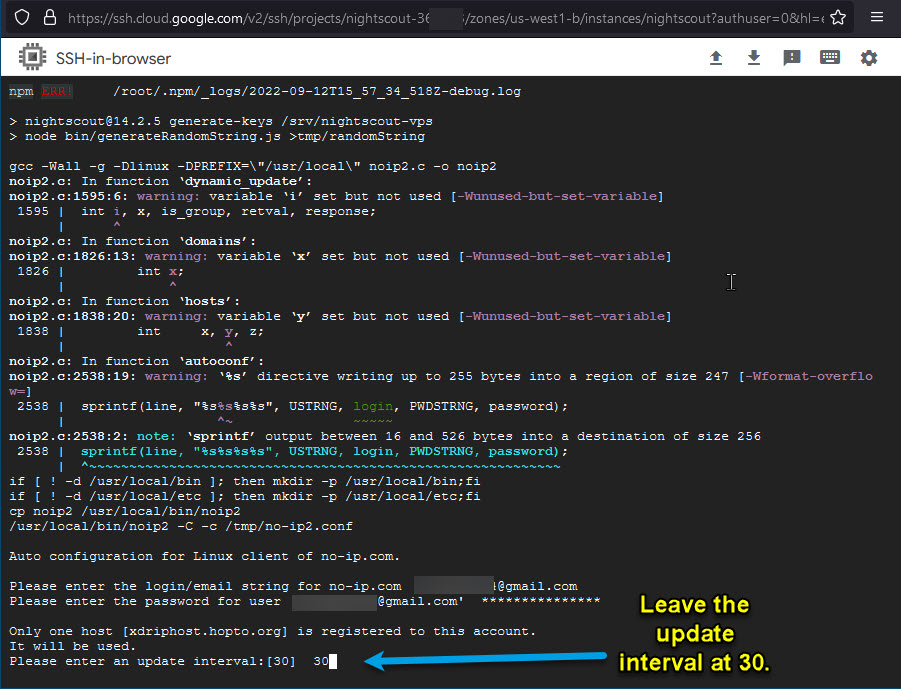
c. Terminal Process:
⌁
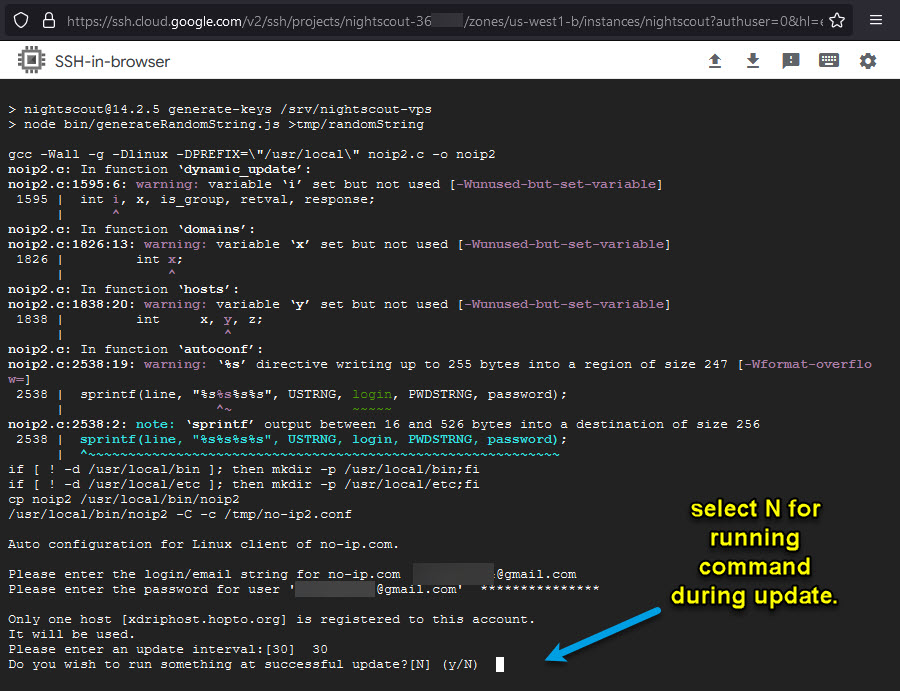
Now Leave the update interval at 30.⌁
Select N for running command during update
⌁
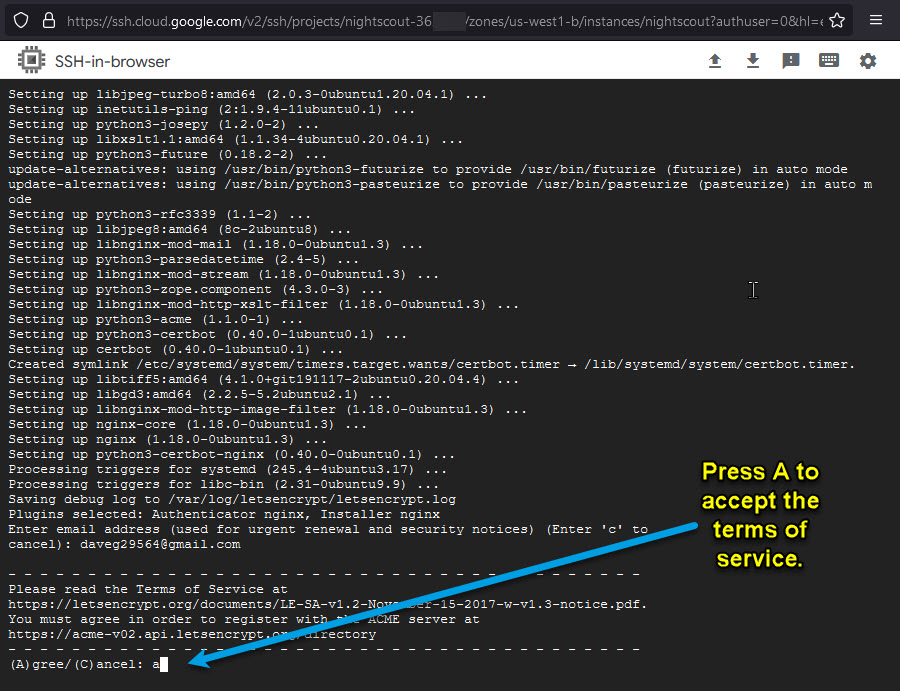
Enter email address “used for urgent renewal
⌁

Press A to accept the terms of service.
⌁
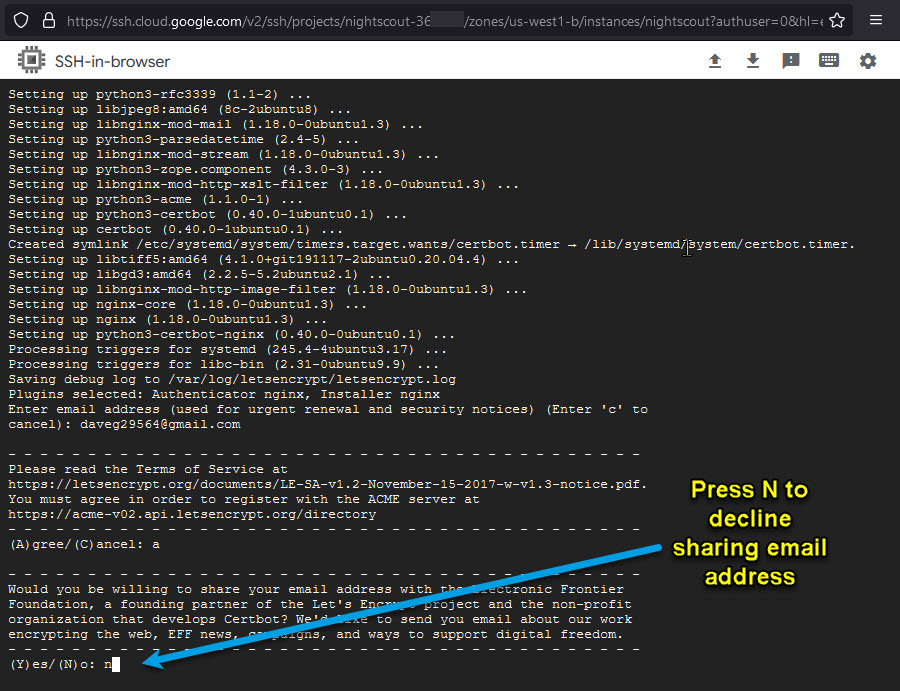
Press N to decline sharing email address.
⌁
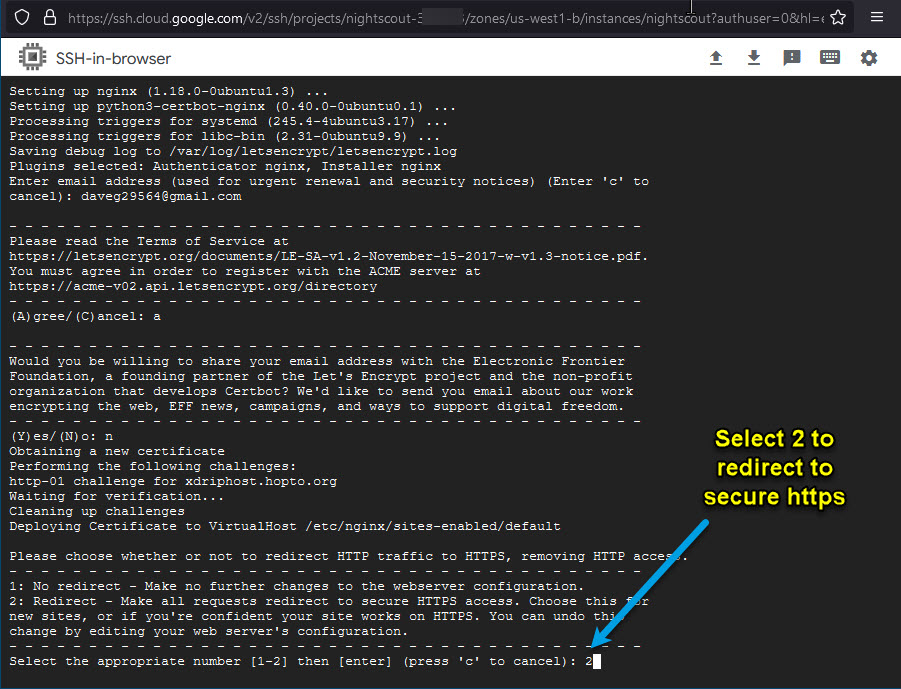
Select 2 to redirect to secure https.
⌁
If you want to copy your old nightscout site, please state the name here ( Example: https://site.herokuapp.com) To skip just press enter.
⌁
I added my old Herroku account here.

API secret:
You will be asked to replace the API secret. This is the password you will login to Nightscout with later.⌁
Enter a password and take note of it and keep safe.
It needs to be more than 12 characters long
I would also not use symbols characters within making your password, I don't think xdrip likes it.

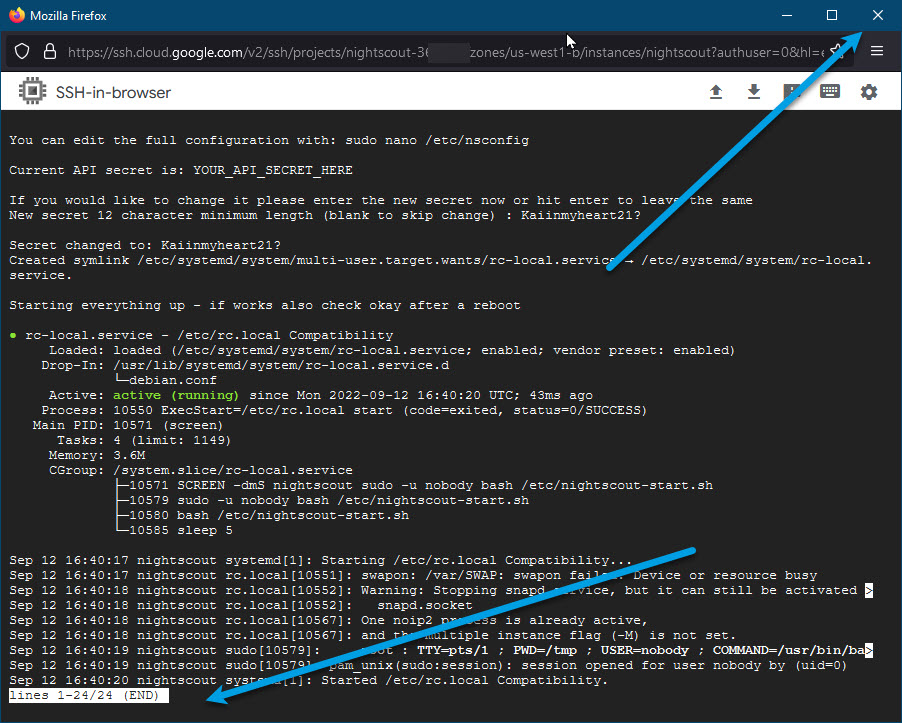
Installation is Complete:
When you see the following, the installation is complete and you can close the terminal by clicking on X at the top right corner of the terminal window.
⌁
5. Now We need to Set up Nightscout:
⌁
Set up Nightscout:
⌁
a. Use a web browser and copy your hostname from noip.
⌁
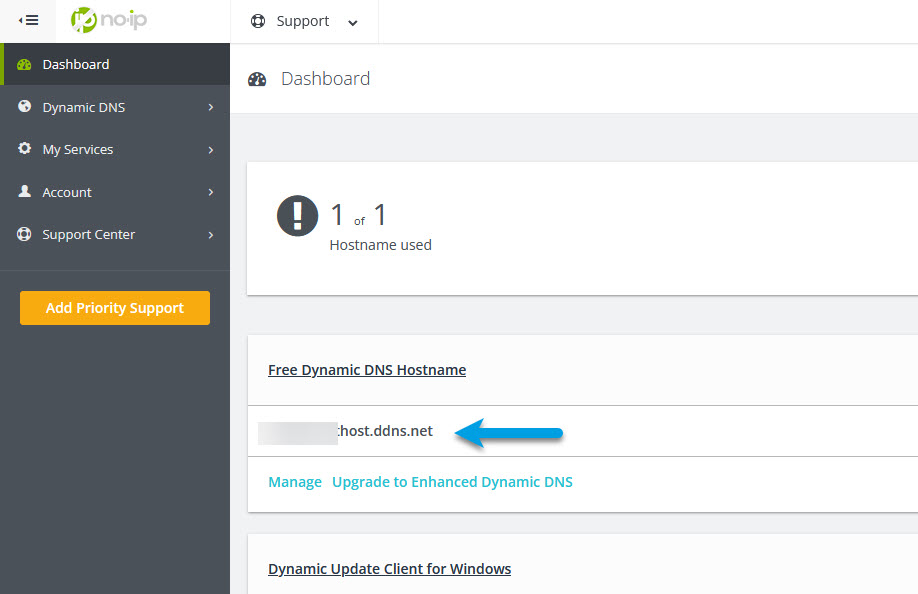
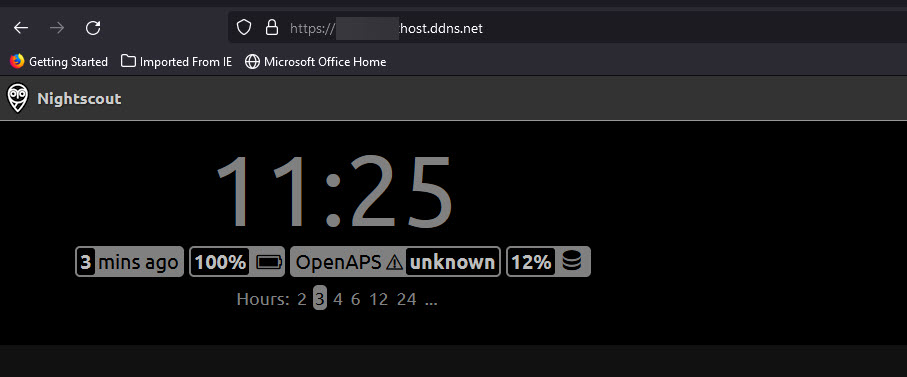
And Paste it into your browser.
(from when you registered at noip.com).

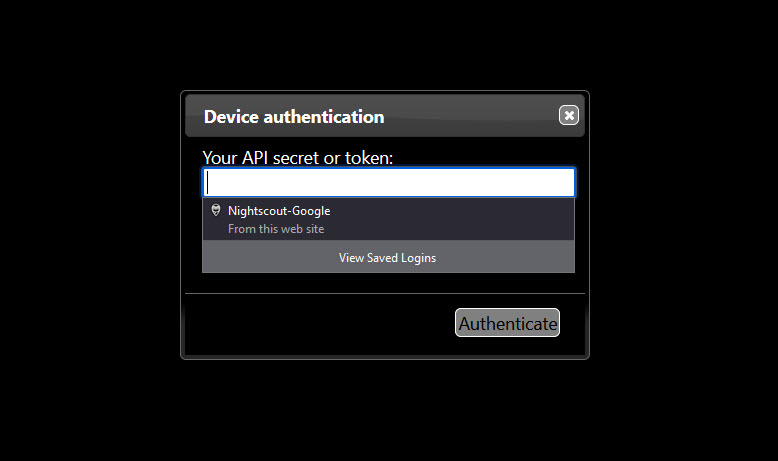
b. This will bring up your Nightscout. It will ask you for a password. Enter your API-Secret you did earlier in the Google Cloud terminal.
⌁
Check “Remember this device” checkbox to avoid having to re-enter it.
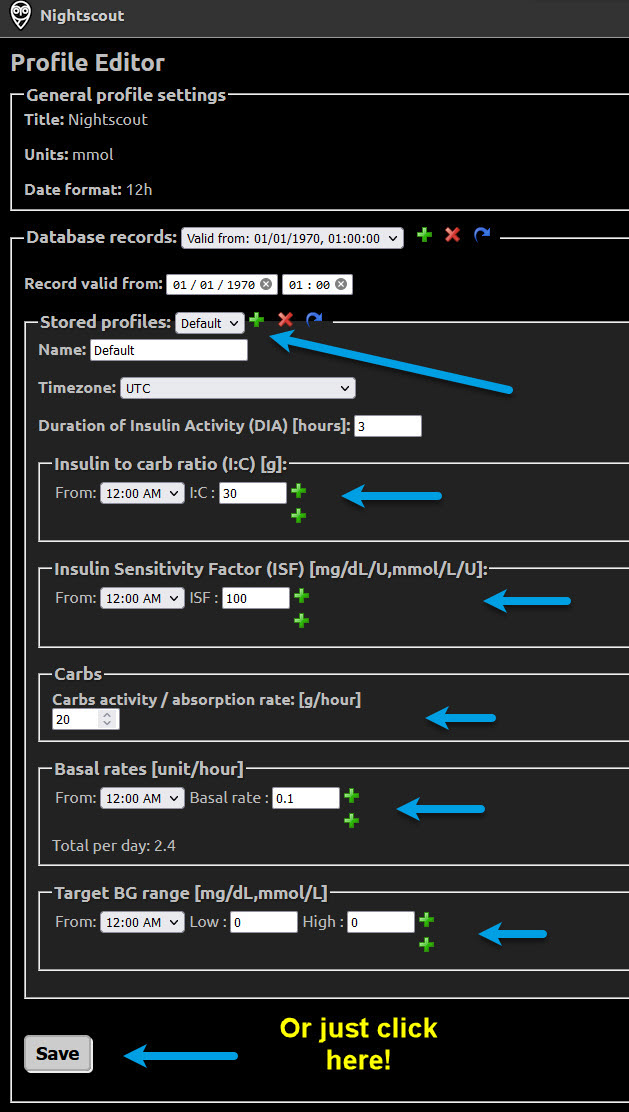
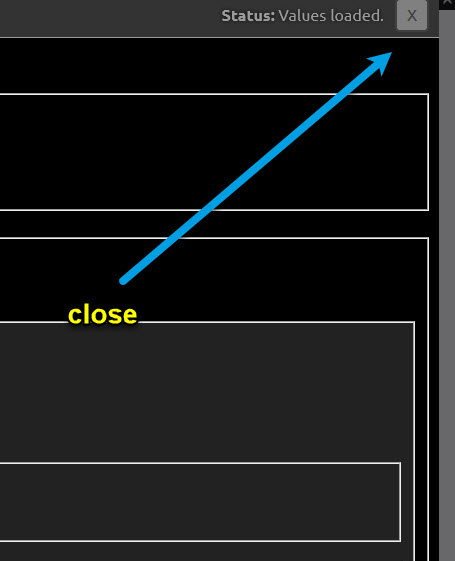
c. On first time, Nightscout will ask you to set up a profile for sensitivity etc. Either enter real values or just click save and then use close button on top right of the screen. You may need to do this twice
⌁
6. Set up xDrip to upload to your Nightscout
⌁
This is what you need to do in xDrip on your master (Main) phone.
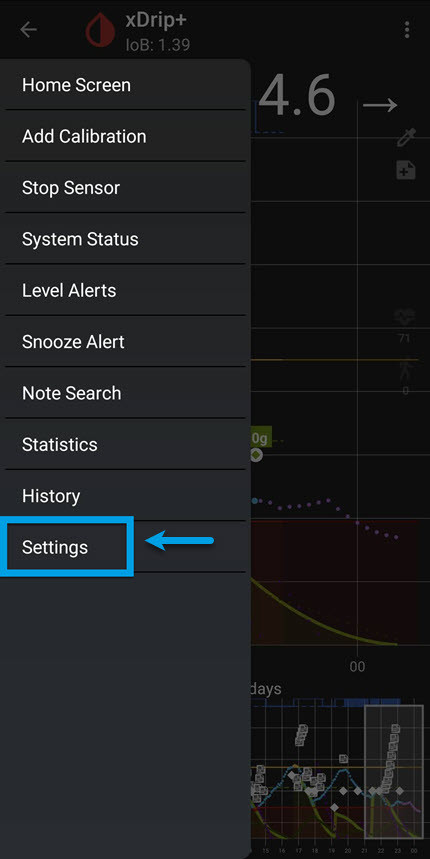
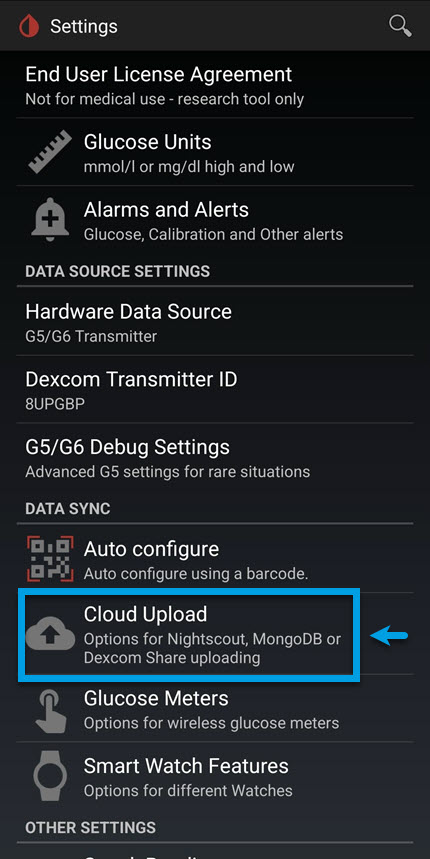
a. Go to xDrip Settings −> Cloud Upload −> Nightscout Sync (REST-API).
⌁
.jpg)
b. Select Enable at the top.
⌁

c. Let’s say the hostname you chose when you signed up for noip.com was hostname. And let’s say you set the API secret, while finalizing the installation as explained in the previous section, to API-Secret.
⌁
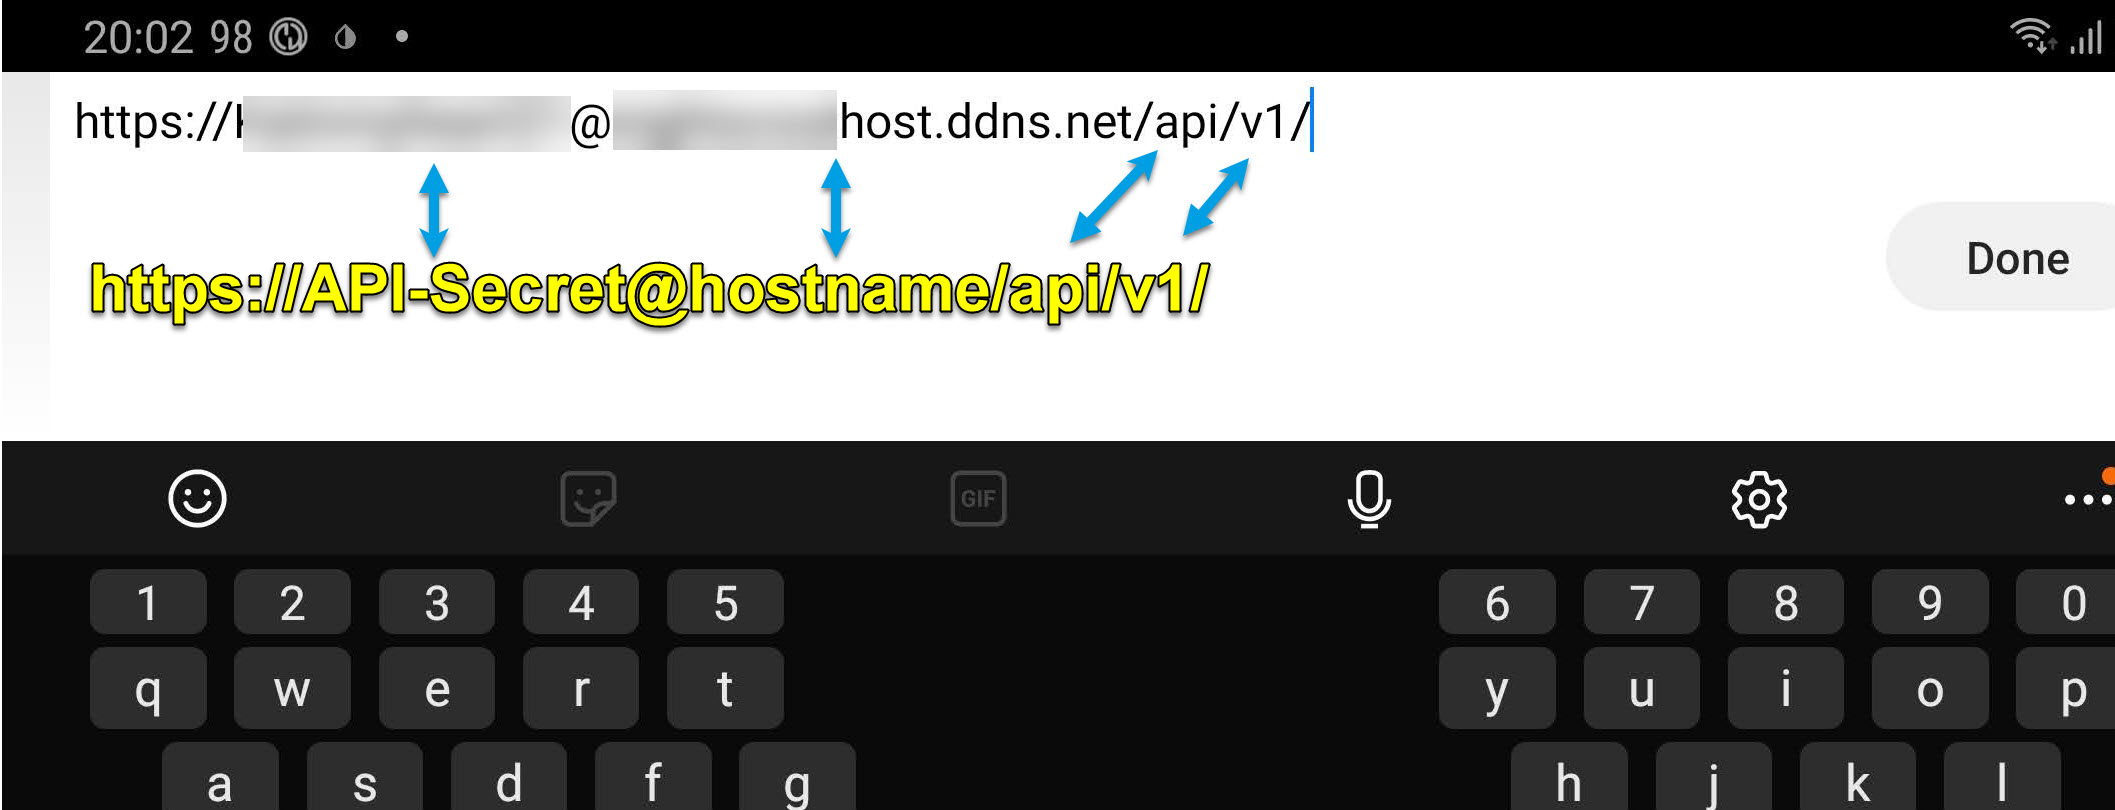
d. Tap on Base URL. Enter the following. https://API-Secret@hostname/api/v1/
⌁
That’s it. Your xDrip readings should now upload to your Nightscout on Google Cloud.
If not triple check the way you have added your Base URL correctly, it is very case sensitive!
7. Set up xDrip uploader to go to your AndroidAPS
⌁
Basic settings for Most CGM
⌁
| Warning! |
| (I have not tested this bit on AndroidAPS so please report any issues if you have any. Links are at the bottom of the page!) |
This is the same has above except your Url will be your web address noip Host address, not like xdrip's where it has Both Secret and Noip host on one line, with the added api/v1 at the end of it.
In AASP it is done separately, you add your Nightscout Web URL and then add your Secret in NS API secret below. There is no api/v1 in it at all.
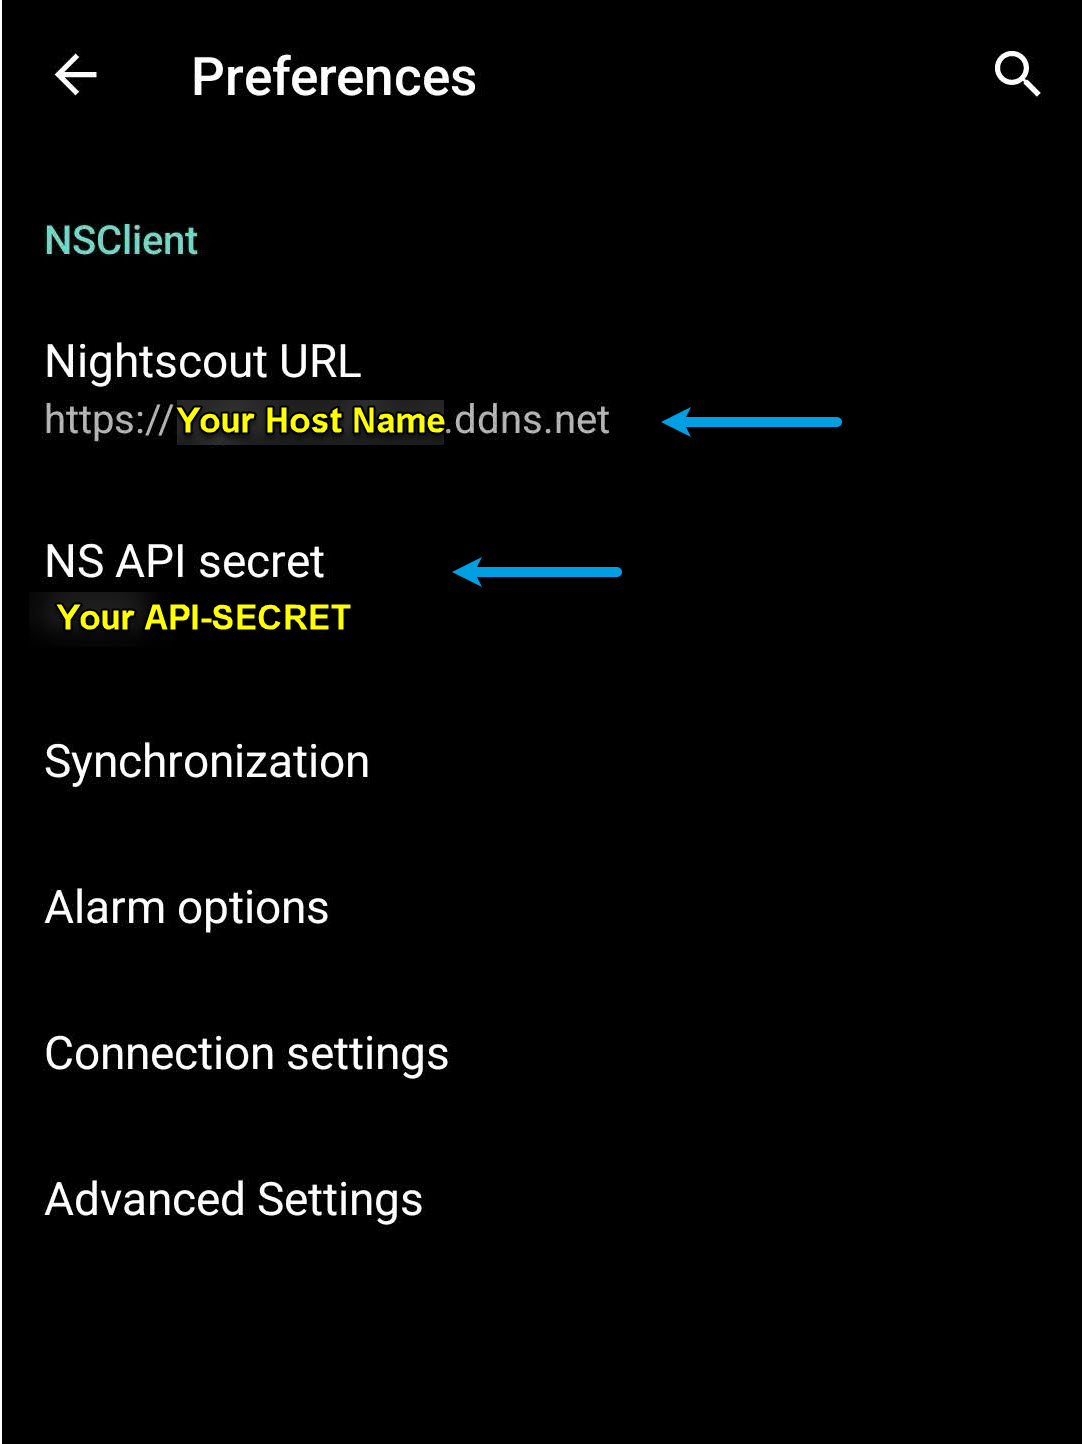
a. Set your Nightscout URL e.g. https://yoursitesname.ddns.net
⌁
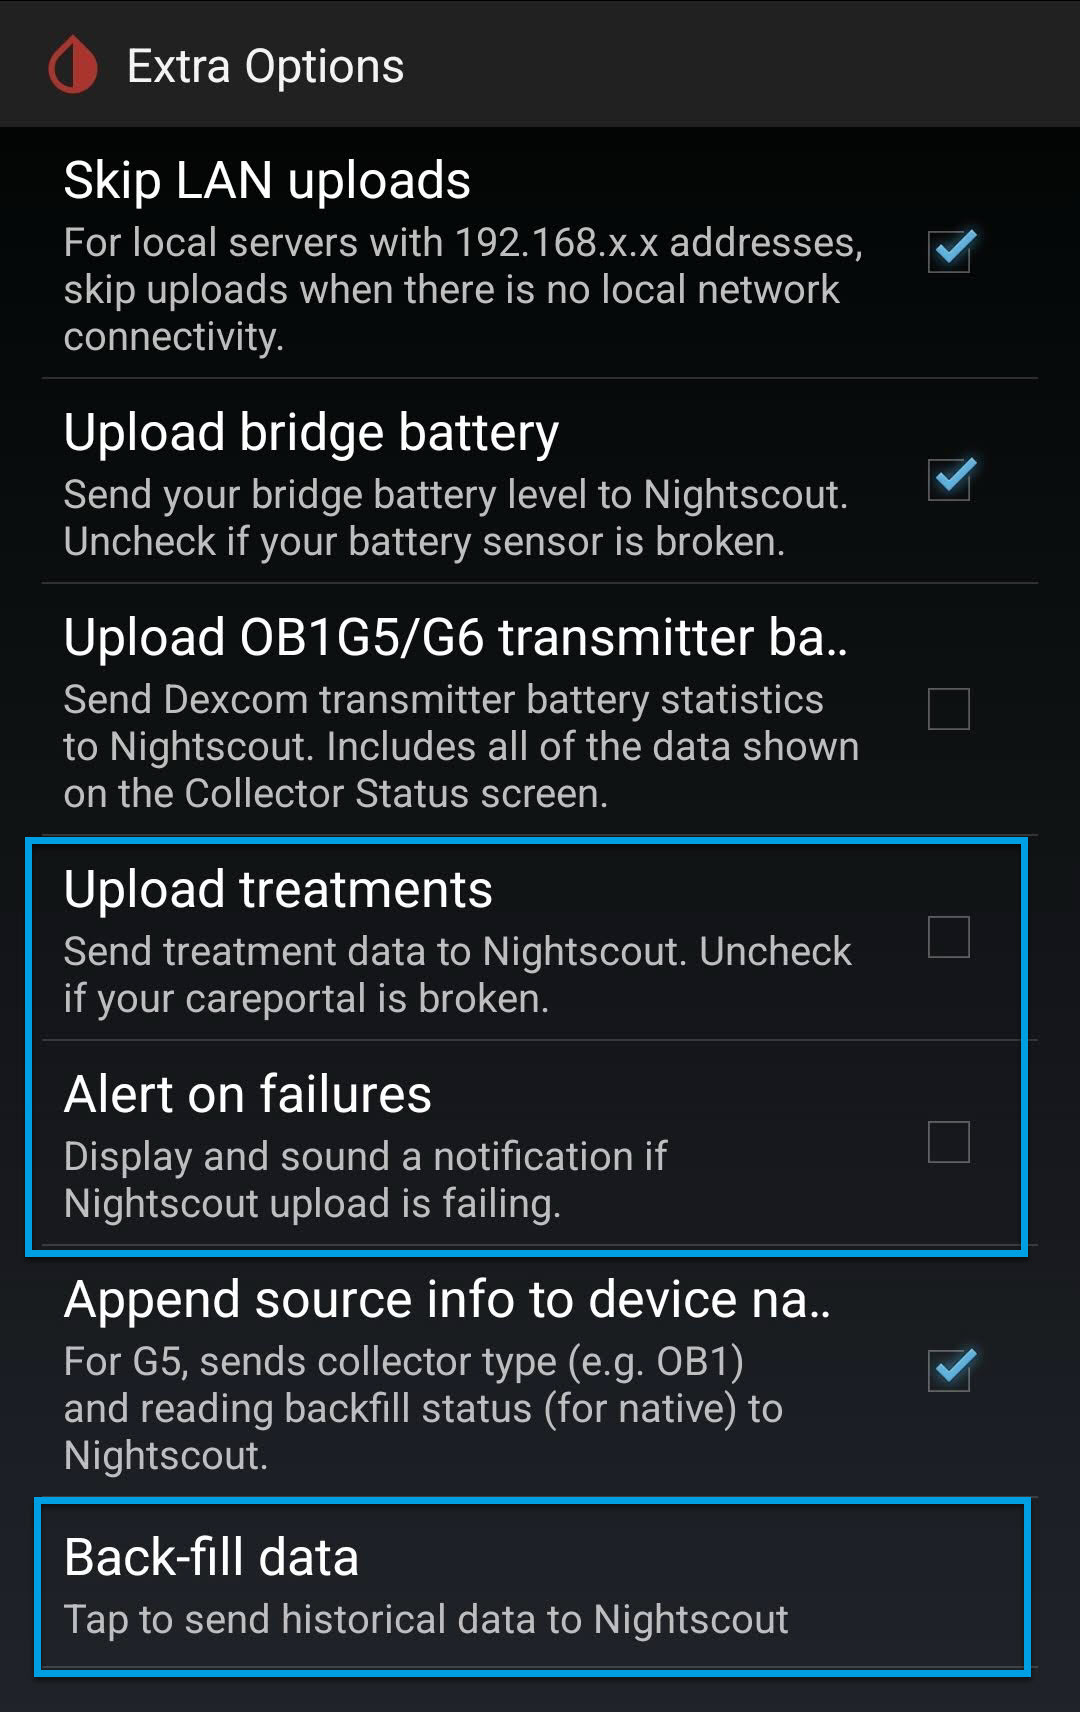
b. You will also need to Disable Upload treatments and Back-fill data from xDrip+, or else treatments can be doubled in AAPS leading to false COB and IOB.
⌁
c. Alert on failures should also be deactivated.
⌁
These are in your settings/Cloud Upload/Nightscout Sync (REST-API) / Extra Options.
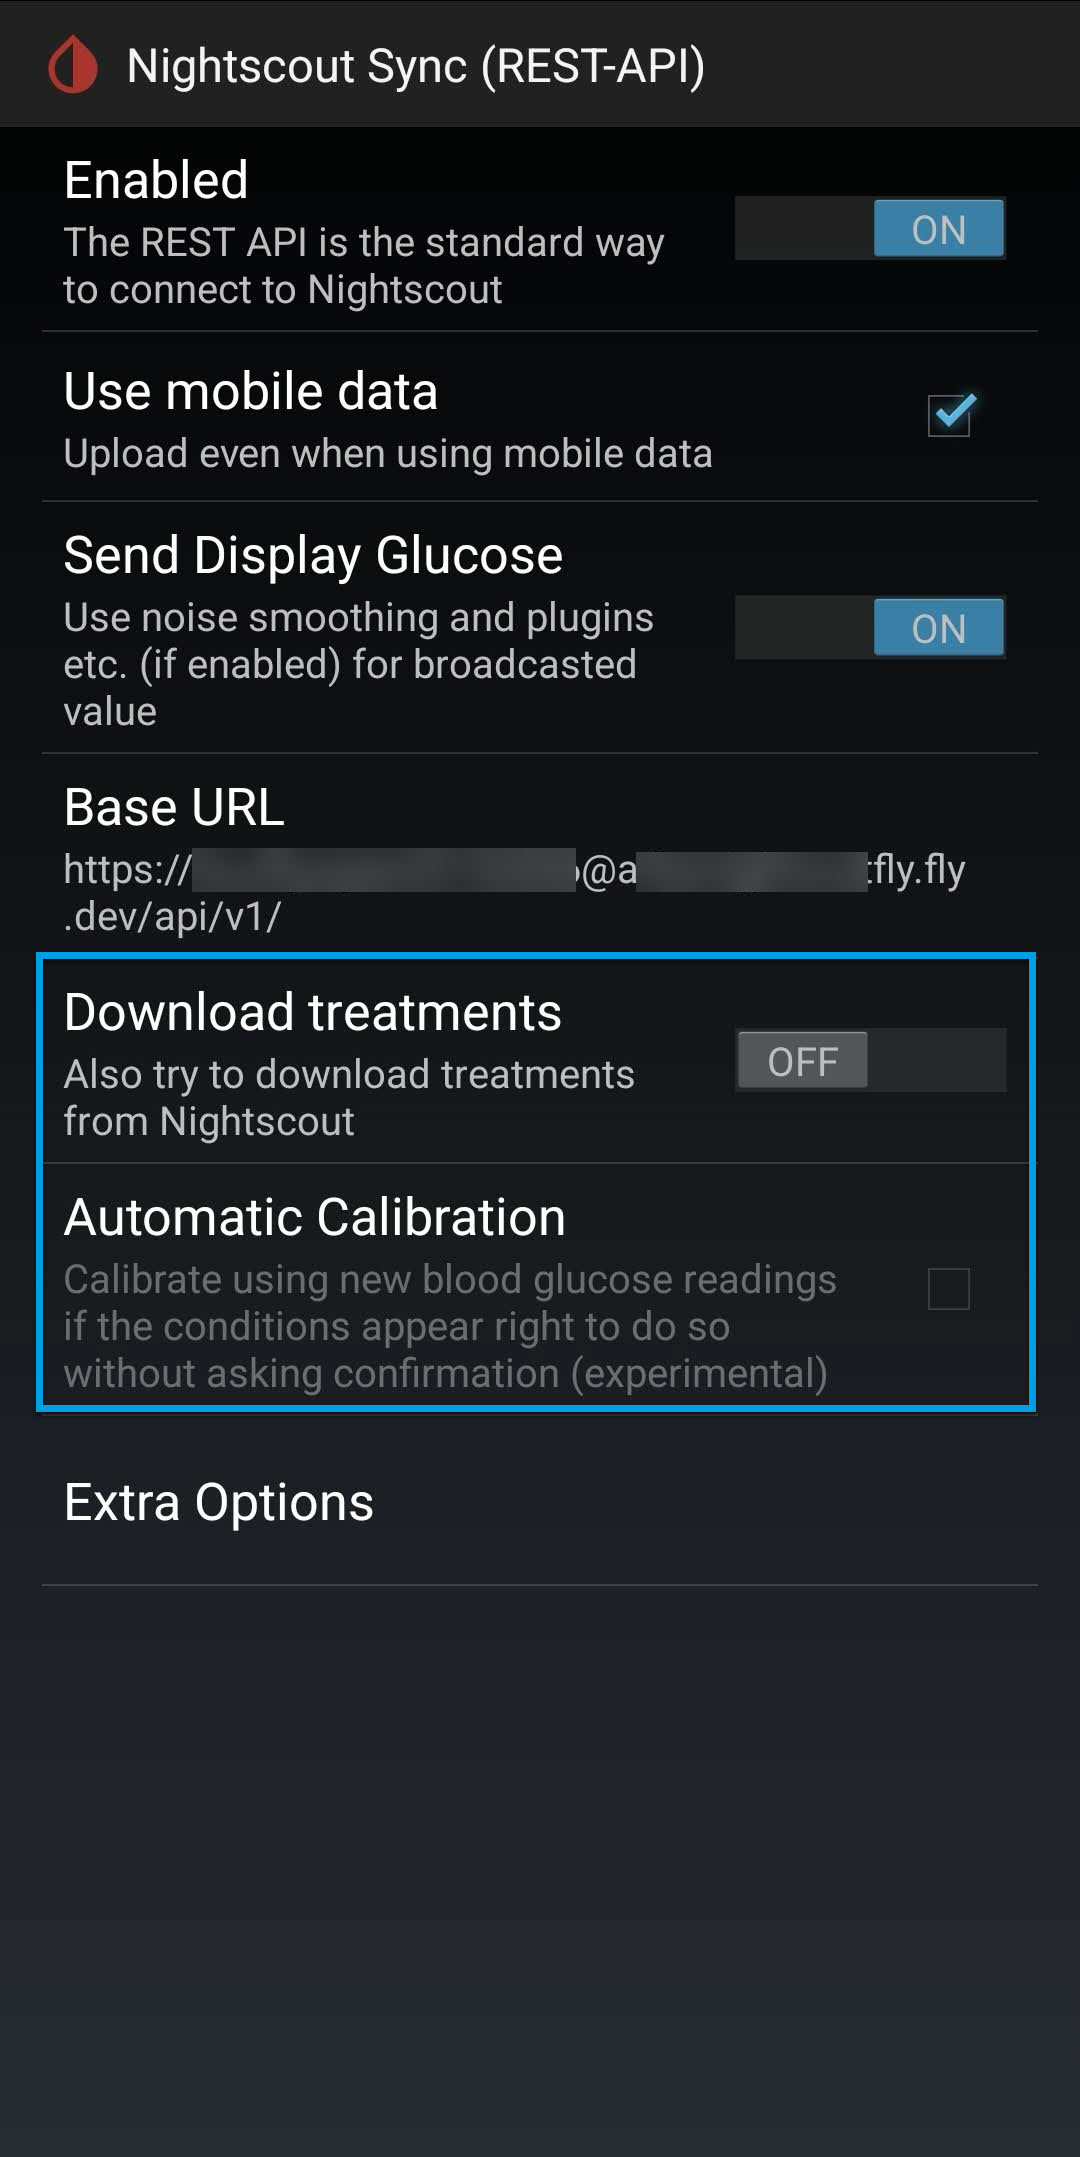
d. Also Disable Automatic Calibration you can enable it for the first time but then after that it will need to be Disabled.
you can do this by selecting the Download treatments to switch Automatic calibration (on/Off)⌁
You can do this at: Settings/Cloud Upload/Nightscout Sync (REST-API) /
8. How to Configure DDNS (Dynamic DNS) in a Router⌁
a. Is another issue some of you may face if you do not have a static Ip address. There is software available for you to download from noip called a Dynamic update client.
⌁
Which can be ok during the day while your computer is running but not so good at night if you wish to be saving power and turning your computer off, has this can and will stop your nightscout from running if your ip changes while your computer is off, making it an unsafe process for nightscout at night.
b. The next video method is good for them that are able to use these router's but again some of us cannot use these methods and these kinds of router with a DHCP some are on routers that only have a DHCU
⌁
c. This I found very frustrating to have to go through all of this due to some Service providers preventing you having a static Ip address. And this process I hope will help resolve a lot of them for you. But again, a cost in having to buy a second router!
⌁
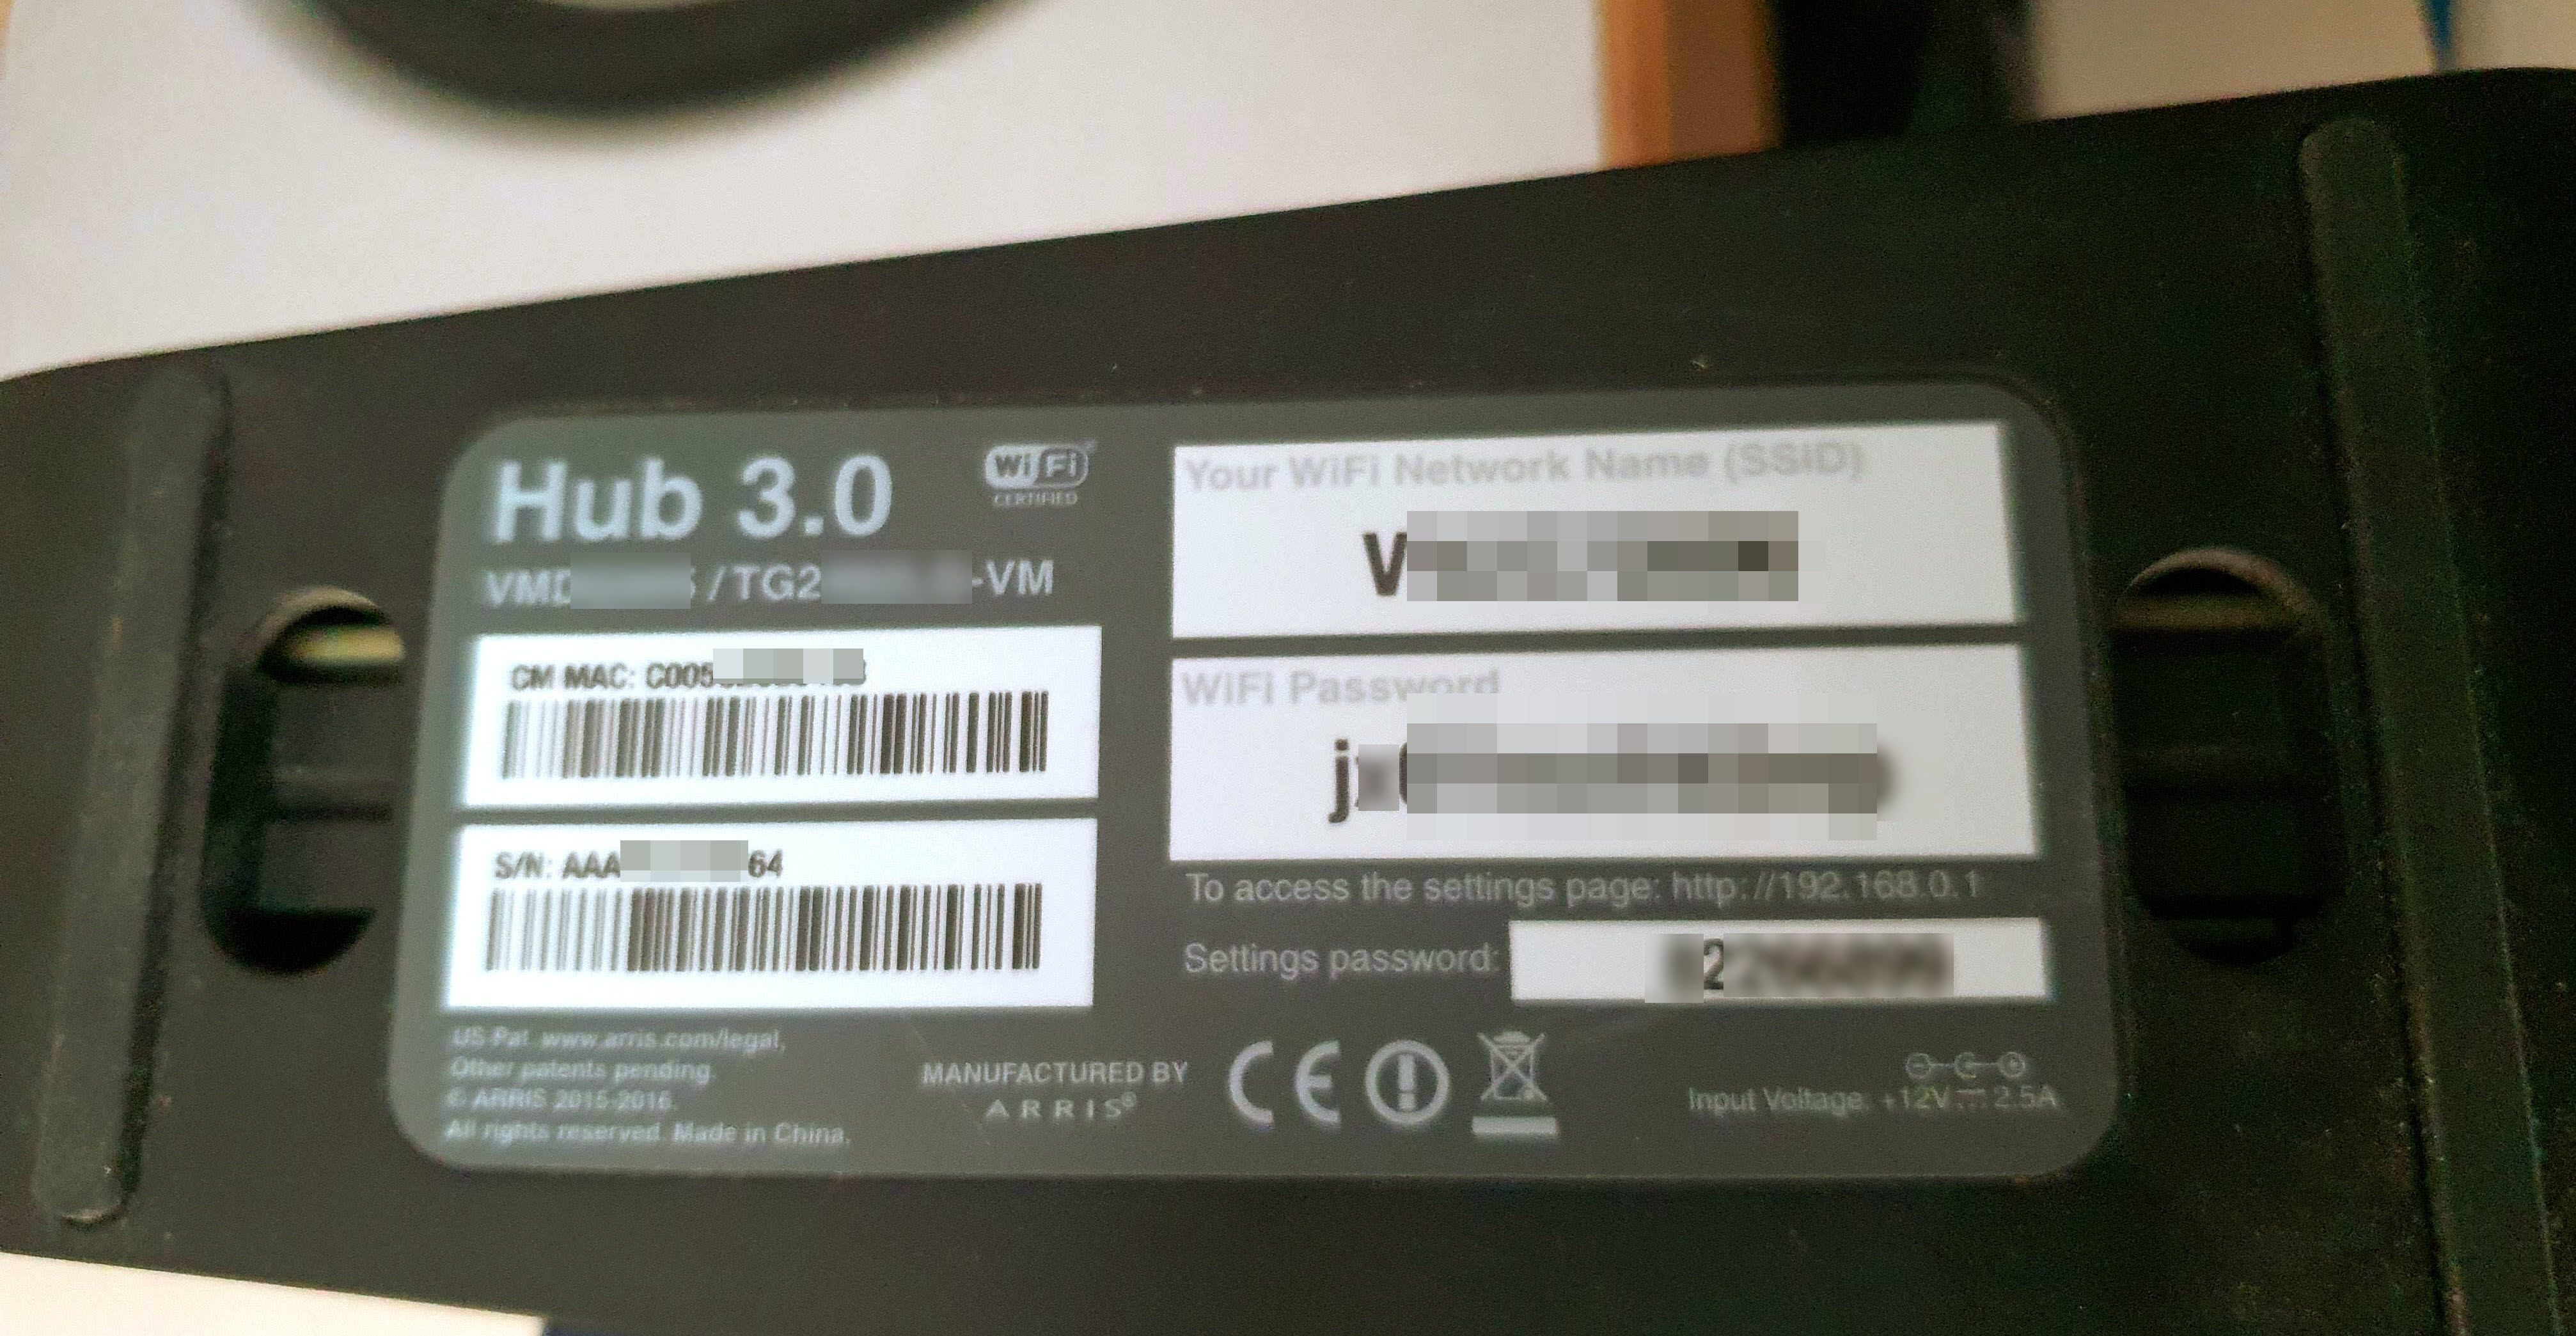
I did this setup running on a Hub 3.0 VMDG505/TG2492LG-VM
9. Create Acess Tokens and Roll⌁
Set up Nightscout tokens for your followers and AndroidAPS
⌁
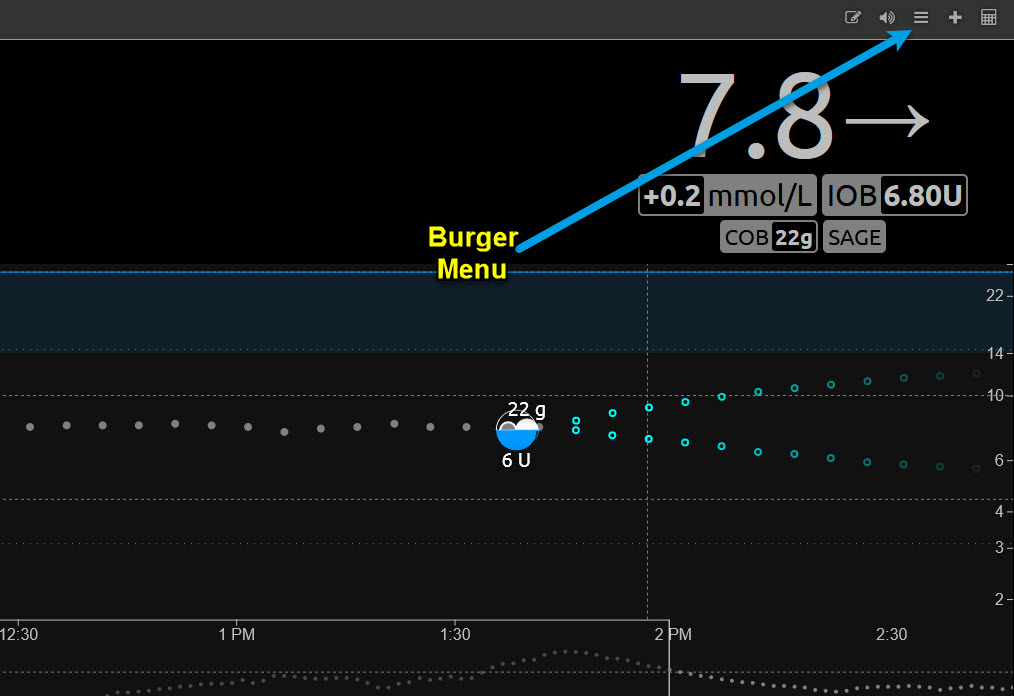
a. Go to your Web site Nightscout and verify again and verify API-Secret again if needed. See "Now We need to Set up Nightscout" above. And click on the top right menu button.
⌁
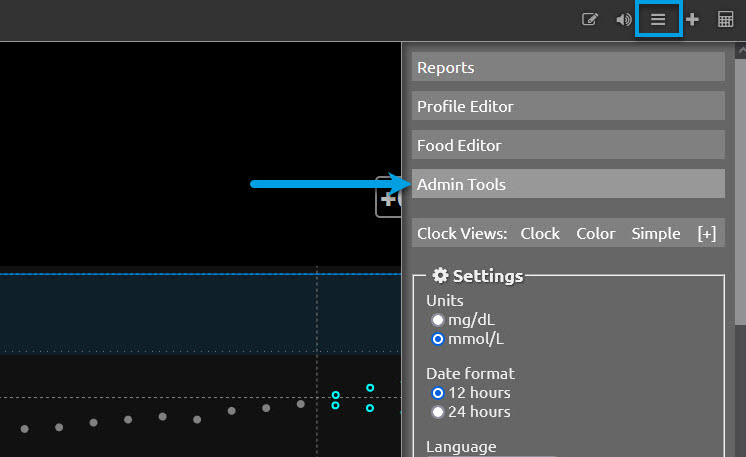
b. Click on "Admin Tools"
⌁
c. You will see seven predefined roles:
⌁

Roles
-
admin: full Access
-
Readable: read-only access; no ability to make CarePortal/treatment entries. This user can view reports and profile information.
-
Careportal: can view the site and make CarePortal/treatment entries
-
Denied: no access (this role only works if the AUTH_DEFAULT_ROLES setting is also denied. You can’t have a site that is readable to everyone and create a “denied” token for a specific user.)
-
Devicestatus-upload: used by devices.
d. Make a Token
⌁
Click the 'Add New Subject'

e. In the form that opens, enter a name. Then under “Roles”, copy a role from the table. For example, for your dad that is only supposed to see your readings and nothing else and not be able to enter any other details or do anything else, then enter 'readable' in the roles section.
⌁
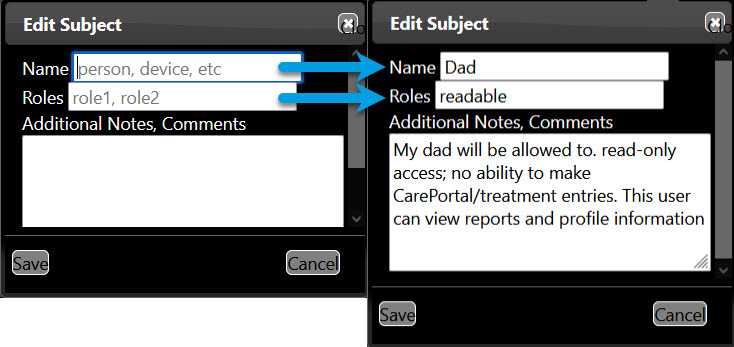
You can enter a combination of different roles by separating them with “,”
You can also add an optional comment if you like, and then click the save button.
f. The token will be displayed. You can use it in two various ways:
⌁

Now make sure to take a note of the access token, that you are given
You can create multiple tokens with specific permissions for each.
| Note! |
| Now make sure to take a note of the access token, that you are given. You can create multiple tokens with specific permissions for each. |
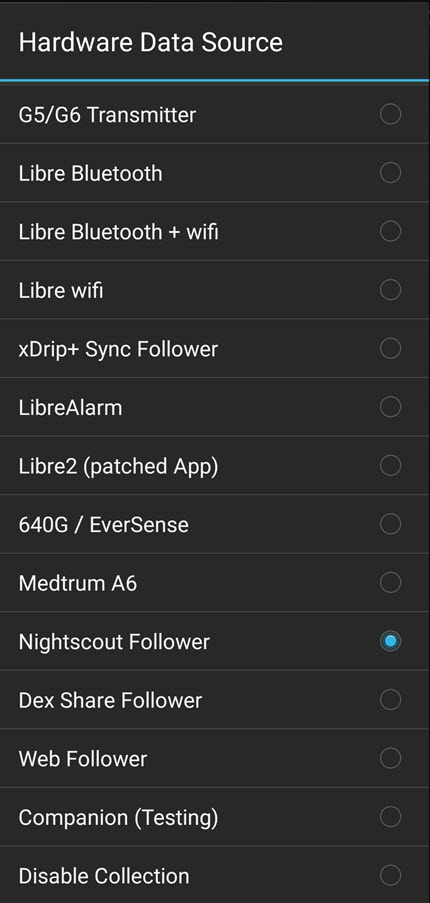
10. Setting up xDrip as a (follower) like your dad, from the example above⌁
a. In the xDrip Data Source Settings, choose “Nightscout Follower” as the hardware data source. See xdrip - Base URL for more information
⌁


Issues or Concerns⌁
If you have any issues or concerns please post your questions in the
 Facebook Group or you can go to the Discussions on Github
![]()
 Why Not take visit UK Wide Cycle Ride - Diabetes.uk or Swim22 - Diabetes.uk for your Diabetes Needs!