Welcome to The Diabetic way⌁
For full Website content visit The Diabetic Way.
From this page you will find the following information:
Your Nightscout Website Features
Customizing your Nightscout Website
Customizing the Alarms & Levels
Changing the Default Measurement to MMOL
Setting up Care Portal
Nightscout usefull Information
⌁
Check what version you are upto on your Nightscout site. In my example I'm on version 14.06 (Liquorice)
| Note! prefer video, see below |
Updating your website to the latest version See Here for the current released version at moment) is easy with the update tool linked below.
Instructions⌁
These instruction have been made on the 28 April 2021
| Note! |
| Azure Users as of 0.12, Nightscout no longer supports the free Azure platform now. If you really want to keep using Azure, don’t update to any version above 0.12 |
Step 1 Update Github Repo⌁
-
Log into your GitHub Account.-- Here -- Wait: Make sure you’re actually signed into your GitHub account and Check by looking in the upper right corner of the page to verify. You cannot do this later.Best to do it now!. 😉
-
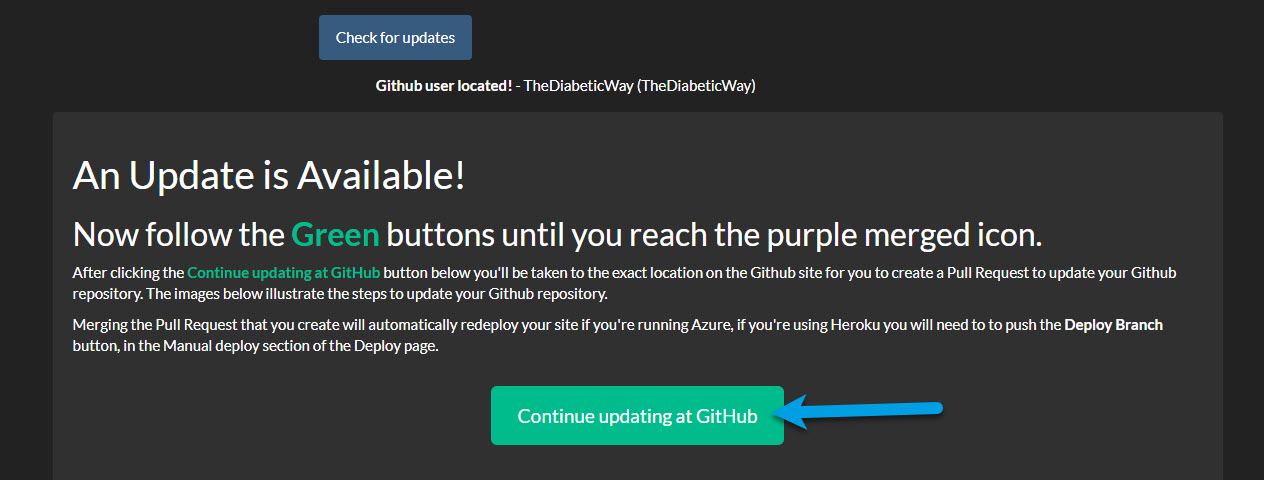
Now-- Click Here -- to open the update tool or image below!for Nightscout in a new tab from Github. Make sure both are open
-
Enter your GitHub username and click the blue button that says Check for updates. (Note: your username is not an email address.)
 click the blue button that saysChecks for updates
- If an update is available, the tool will tell you this,and provide directions for you, and also give you a button that will take you to GitHub to finish the process.
- Click the Continue updating at GitHub button. Review the directions on the screen that pops up, and continue.
step 2 (see Step1 & Step2 video below)⌁
- Click "Create pull request" Your fork must be on the left side
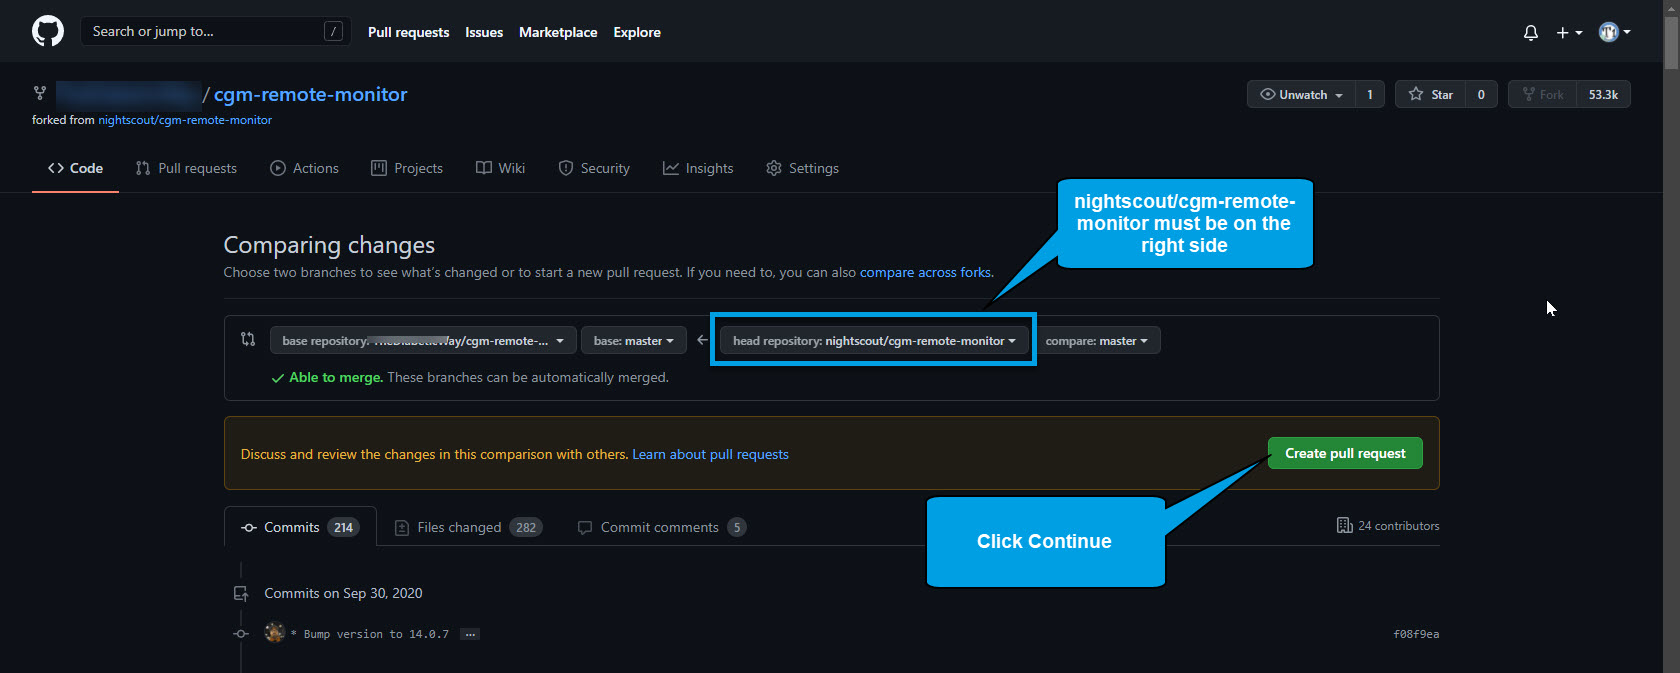 and the nightscout/cgm-remote-monitor must be on the right.
step 2.1 create pull request⌁
- Click "Create pull request” again, do not change the comparison. Your fork must be on the left side and the nightscout/cgm-remote-monitor must be on the right side.
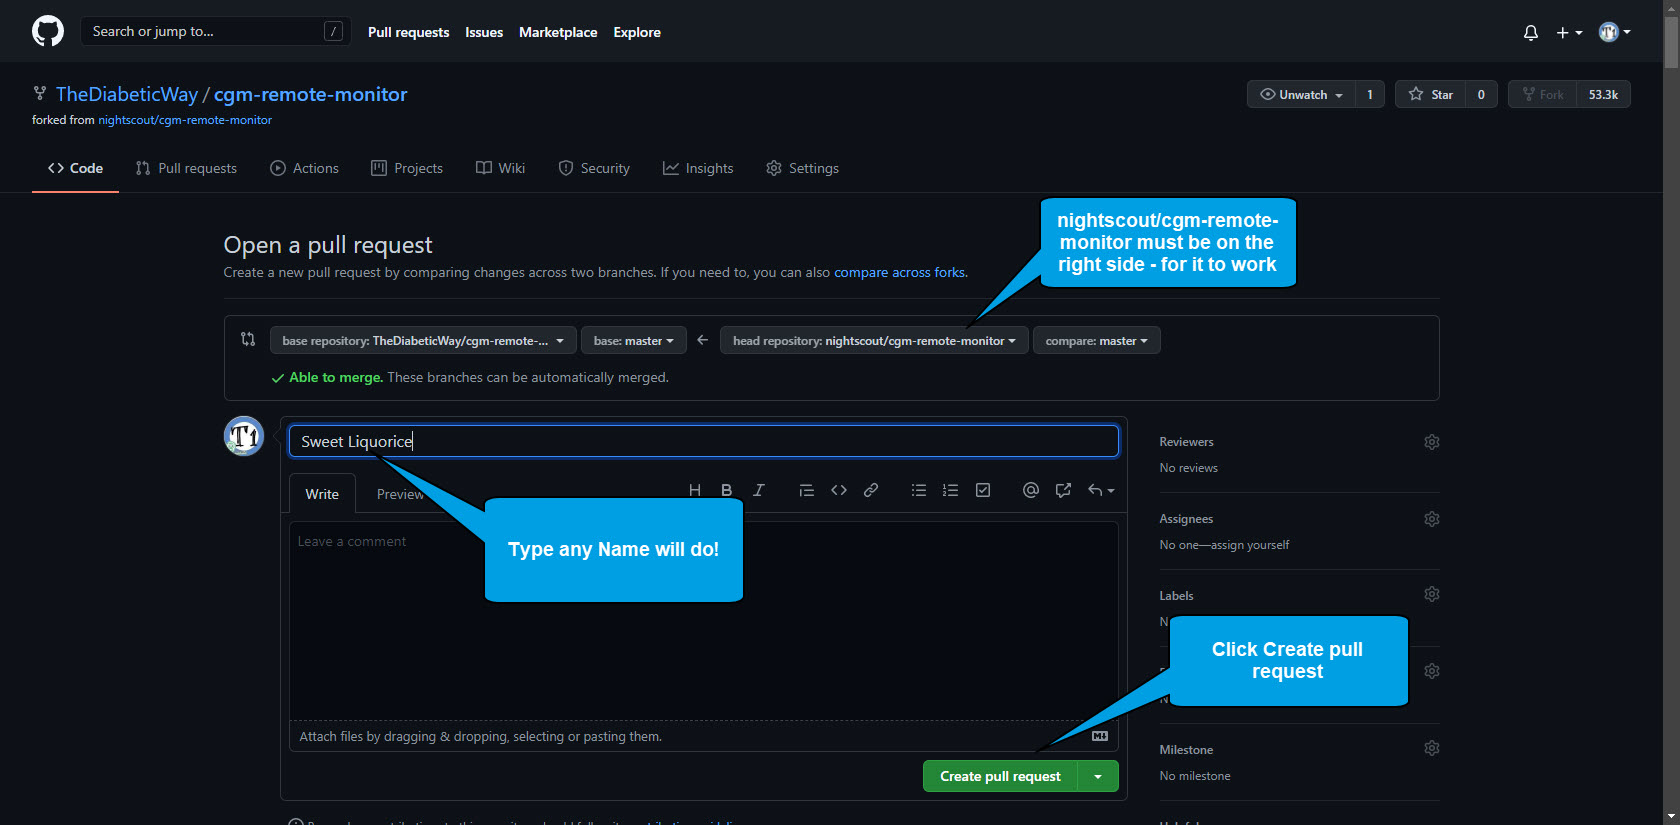
- Also Give your pull request a name like “Update” or “Sweet Liquorice Update” — doesn’t really matter what this is.
Step 1 & Step 2 Video⌁
| step 1 & Step 2 Video |
step 3 merge pull request⌁
- Click "Merge pull request
- or see video below
| Note! video, |
step 4 confirm merge⌁
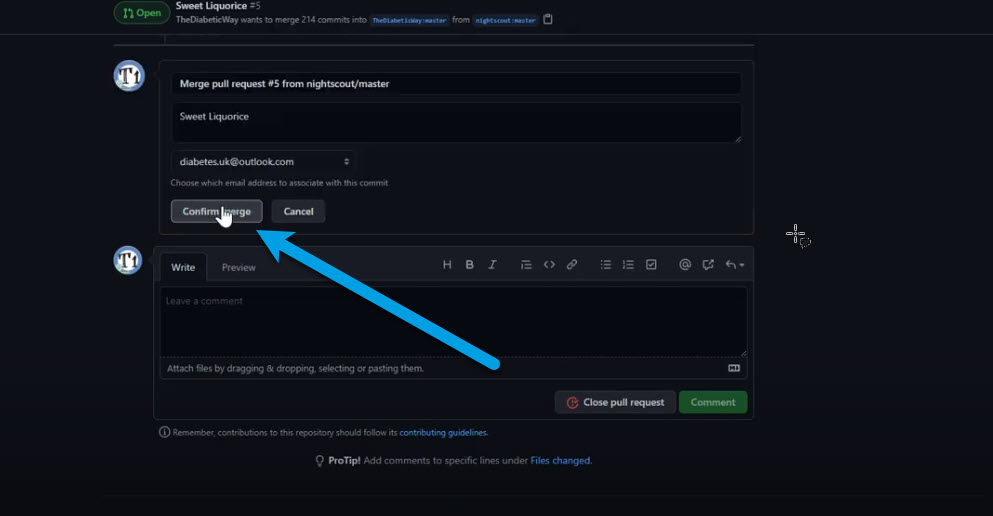
* Now Click the Confirm merge button.

step 5 merged⌁
-
If you see "Merged" in purple, you have successfully updated your fork. If you're using Heroku you will need to to push the Deploy Branch button, in the Manual deploy section of the Deploy page.
-
You have successfully updated your GitHub repository, now let's deploy it in Heroku.
| Note! |
| If you’re on Heroku and have Automatic Deploys enabled, you’re done! If you don’t have Automatic Deploys on yet, or aren’t sure, run through these steps below! |
Step6: Deploy in Heroku⌁
-
Log into Heroku
-
Select your app
(In my case The Dibetic Way)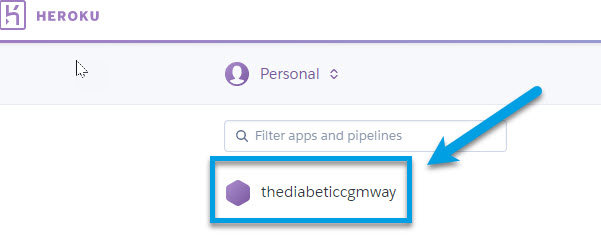
-
In the middle bit, click on the GitHub button if it isn’t already showing as connected. It will ask you to authorize the connection if you’re doing it for the first time.

-
Type “cgm” into the repo-name search box, and click Search
-
Click the Connect button once it finds your cgm-remote-monitor repository. You should now be connected
| Note! see video |
-
Or if Heroku is not connected to GitHub, scroll down and click Connect to GitHub, if a popup window opens and requires authorization, click Authorize Heroku
-
Now after connecting to Gitnub, Scroll down to the bottom of the page, make sure to select the master branch and then click Deploy Branch

- Build will start, do not interfere and wait for completion. It can take a while approximately around 10 minutes Do not Interrupt the process has it can lead to a broken site and you'll need to restart again.
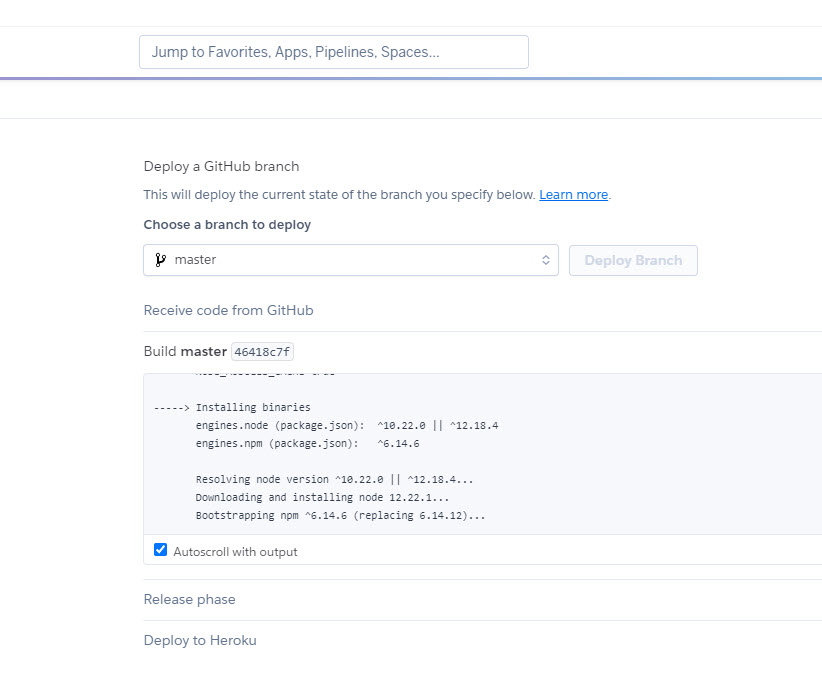
- Wait until the deploy process completes and click View if nothing happens click Manage App then upper right Open App

- Your site will open and it should be at the latest version on your Nightscout Site
- You're Finished!
- Head over to your Nightscout site and check its updated!
| Check if Nightscout as updated Video |
To let your site finish updating itself as soon as you update your fork in the future with another Pull Request, enable Automatic Deploys here (from the master branch):
| Helpfull Note! |
|
|
If you’ve just turned the Automatic thing on, you’ll need to manually do the first deploy — make sure the branch is on master, and click the Deploy Branch button:
| Warning! |
| 1: Some new features, updates, or bug fixes may require that you clear your browser cache before you will see the changes taken effect 2: If you get no errors and no readings after a while see about doing a Redeploying your repository |
 Why Not take visit UK Wide Cycle Ride - Diabetes.uk or Swim22 - Diabetes.uk for your Diabetes Needs!