Welcome to The Diabetic way⌁
For full Website content visit The Diabetic Way.
Part 3 Setting up a Atlas Account for Nightscout
⌁
1. Now Open another tab to make a Mongodb Atlas Account: See Here⌁
and click Start Free
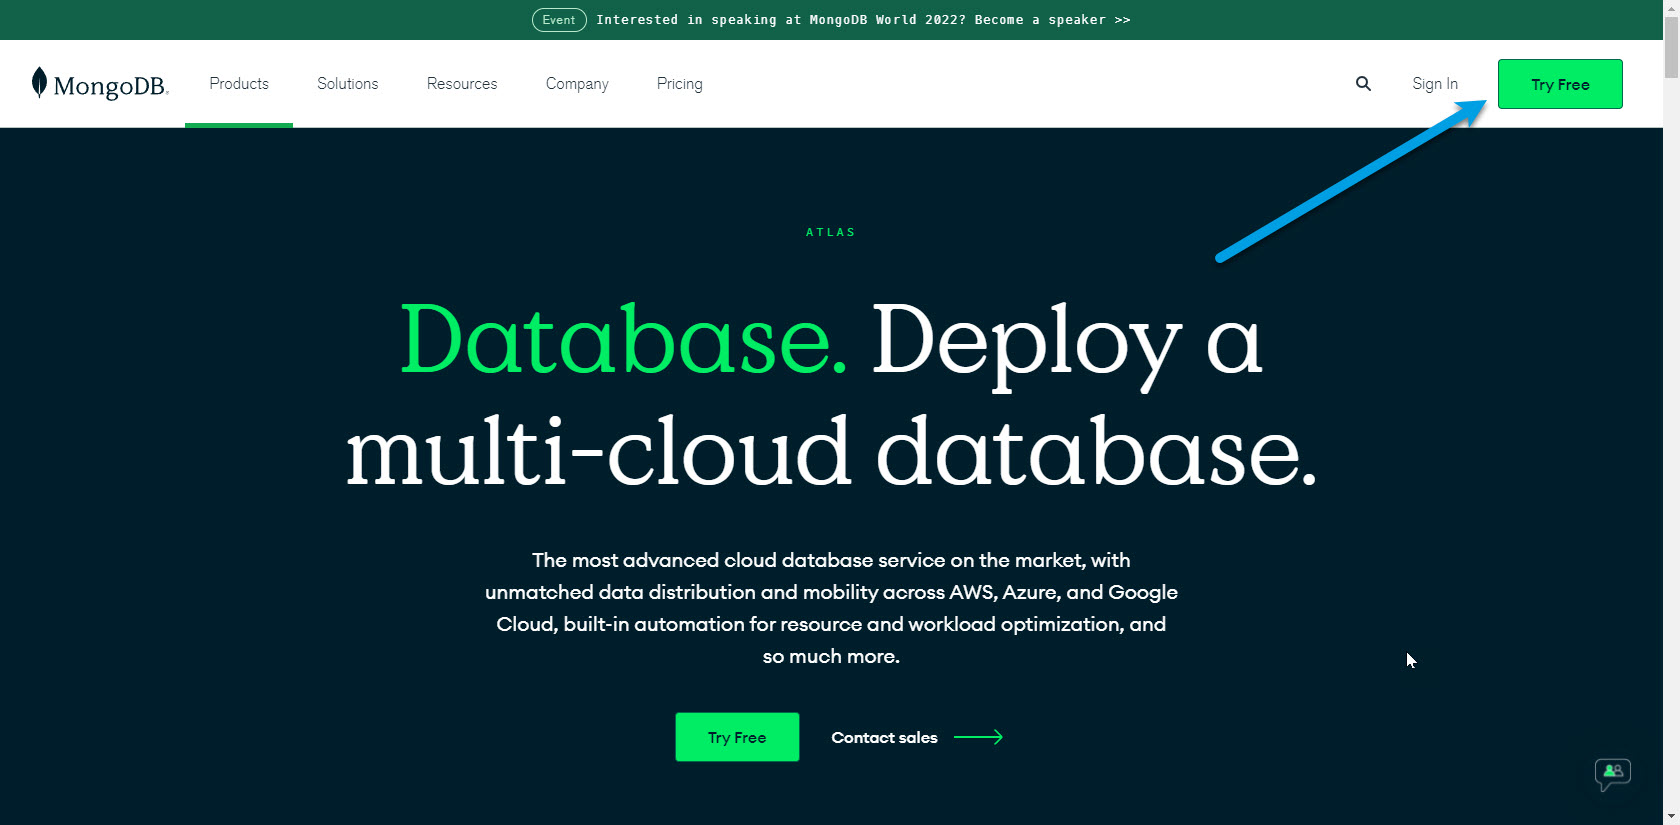
2. Enter your Account Details like I have and then click get started free⌁

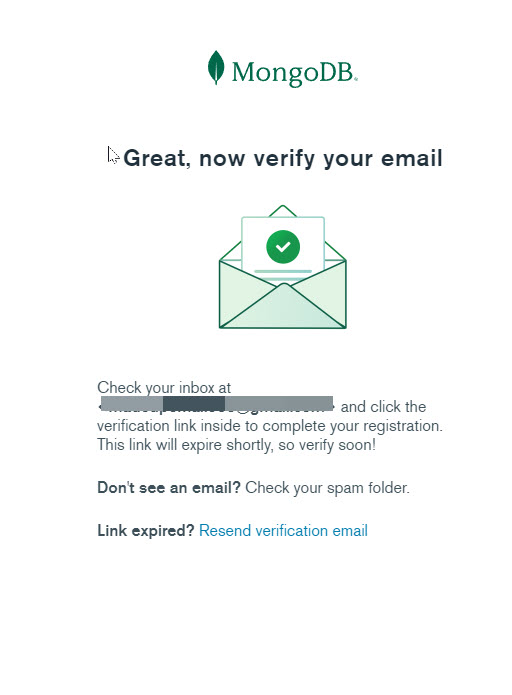
3. Atlas will send you an email, if you don't receive it check your Spam folder.
⌁
4. Now verify your email
⌁
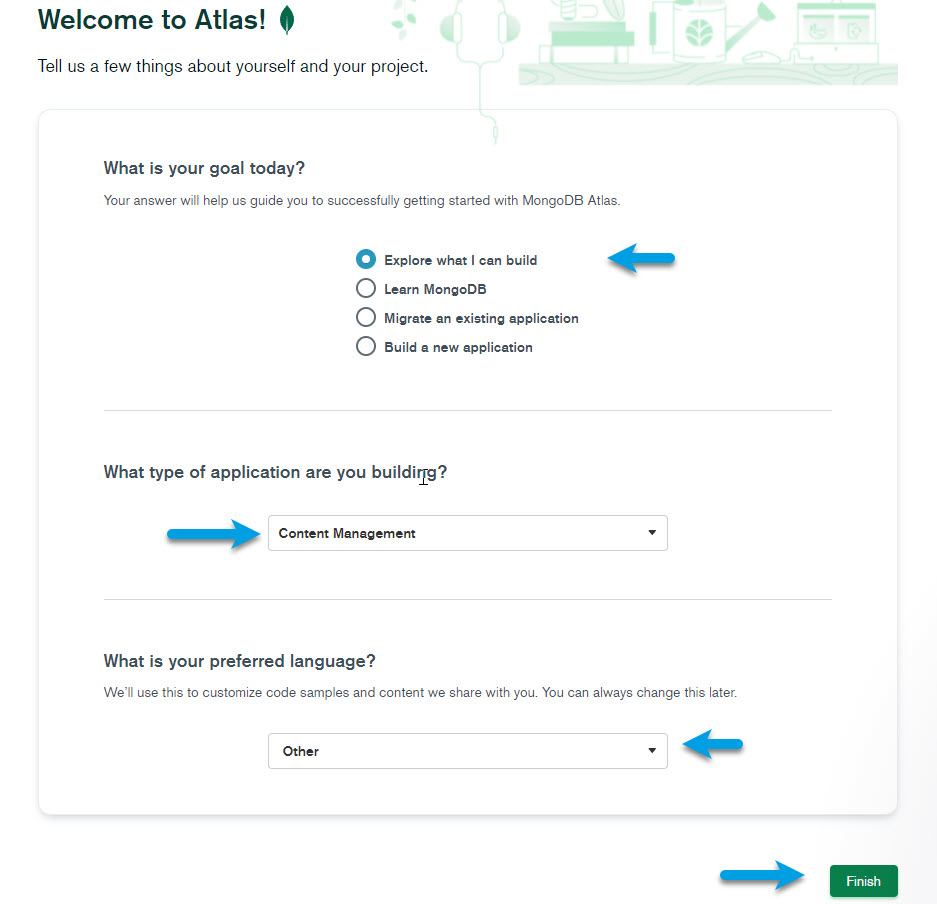
5. Enter some information like I have below and then Finish
⌁
6. Select Create a cluster in Shared Clusters (FREE)
⌁

7. Leave all default values and click Create Cluster
⌁
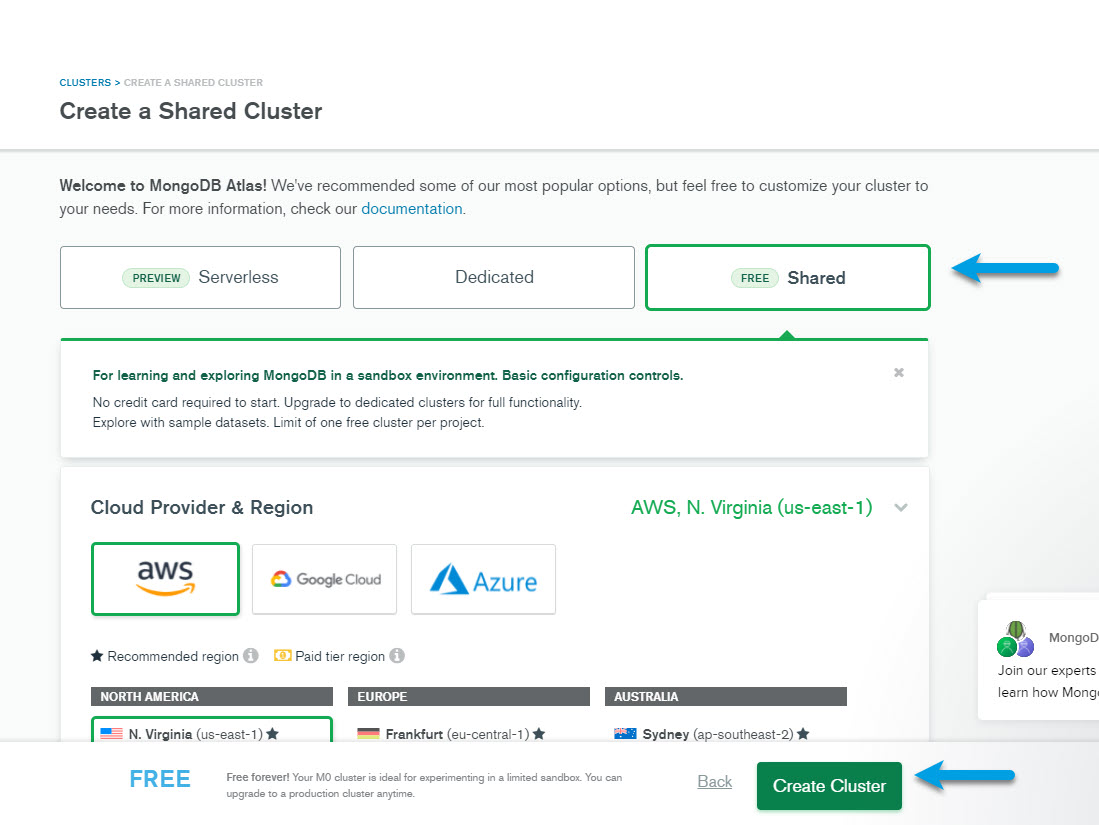
Atlas will create your default cluster, wait until it is complete... (can take more than 3 minutes) If not sure after a while click on the leaf icon in the top left!
8. Click on CONNECT
⌁
<img width="auto" height="auto" border="0" align="center" src="/my-project/img/Atlas/click on connect.jpg" title="click connect"/><br>
9. Click on Allow Access from Anywhere
⌁
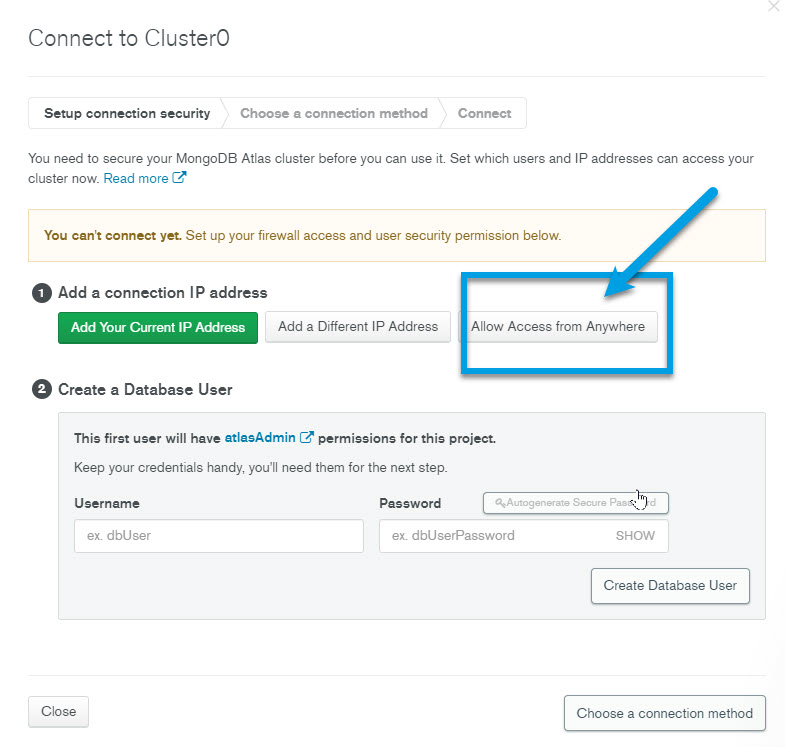
| Note! |
| If you don't allow access from anywhere (IP 0.0.0.0/0) Nightscout will not be able to access your database.! |
10. Click on Add IP Address
⌁
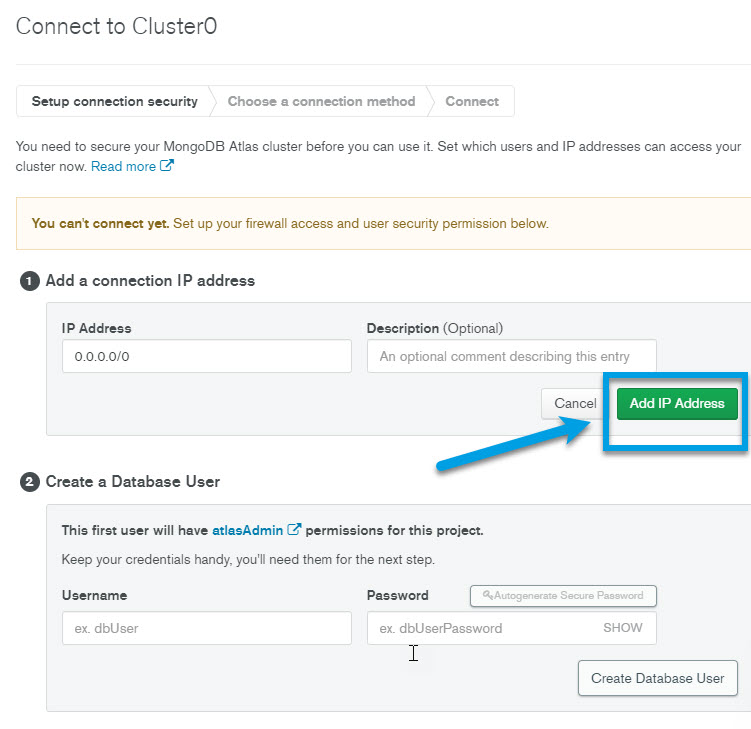
| Note! |
| Database Details: Make sure to not use your Atlas account Account details. Do not use special characters: only letters and numbers. No spaces. |
11. Add a database username (for example nightkai) and a database user password (in the my examples below Madeuppassword7) but please change it later, see both images below!!⌁
<img width="auto" height="auto" border="0" align="center" src="/my-project/img/Atlas/database username and a database password.jpg" title=" Add a database username and a database password, see both images below!"/><br>
12. Then click Create Database User.
⌁
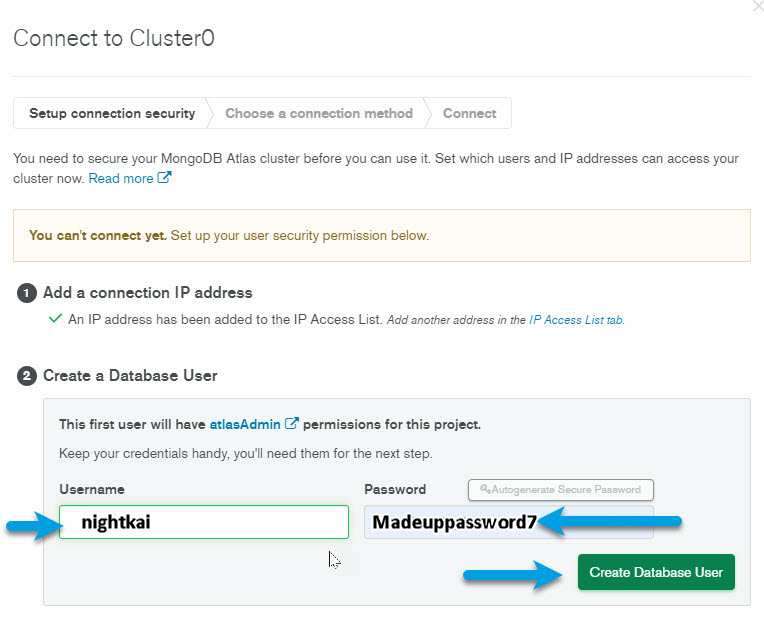
| Note! |
| Make sure you write these details down in a safe place, you are going to need them later in the boxes below to make your Connection String! db user and db user password! |
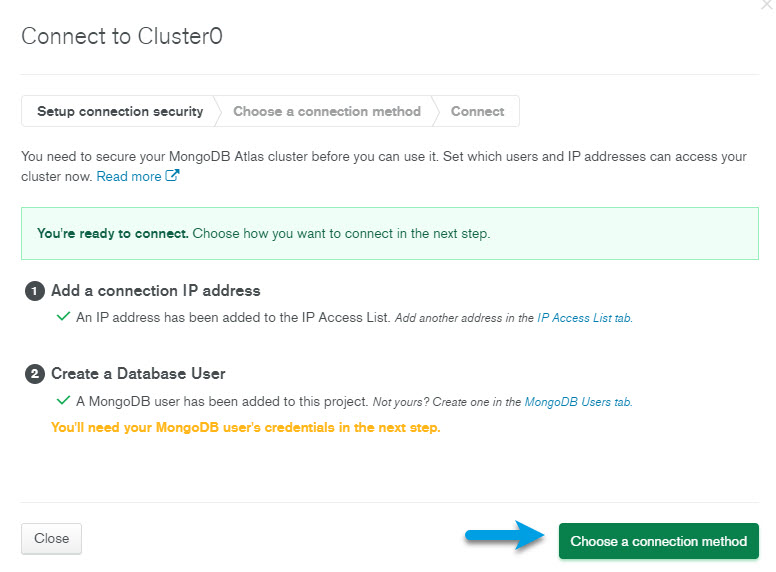
13. Click on Choose a Connection Method
⌁
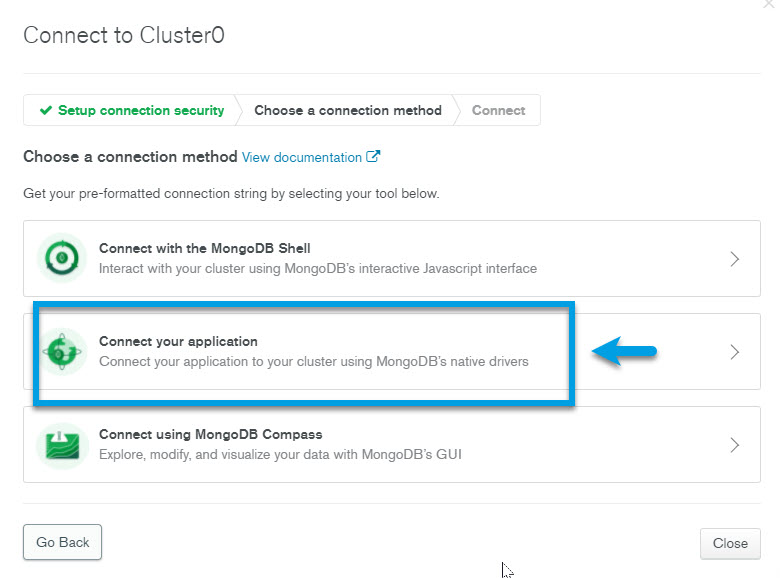
14. Now Select Connect your application
⌁
15. Copy the Connection string: click Copy icon and paste it somewhere to edit it later(like Notepad).⌁
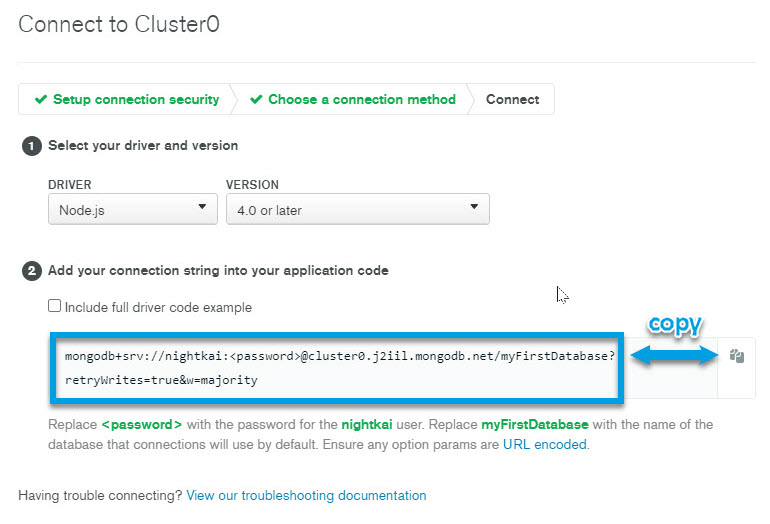
| Note! It should be similar to this - cluster0 (xxxxx) will be different): |
| mongodb+srv://nightkai:password@cluster0.xxxxx.mongodb.net/myFirstDatabase?retryWrites=true&w=majority |
16. Makeup a name for your database, this is not a important information (example kdatabase ), note that default is myFirstDatabase. Only letters and numbers, no spaces.
⌁
17. IIII will try to give you an example about the way to do it below:
⌁
** A. In the boxes below 1st is your Atlas Account you gave yourself a User Name add it to the box below User Name on the left side!
B. Then you also made a Database user Password add your Password you created for your database add this too into the box on the left side.
C. For the Cluster0 xxxxx where everyones will be unique when making a cluster when it is made so yours needs to be added into the Connection string part after it says Cluster0
D. And lastly you made up a Database Name , also add this to the last box on the left and click the Generate button which will generate your connection string code** that you will need to add to your Heroku API
I have given you my examples below on the right side of the boxes so just ignore them they are my examples to show you how the connection string is made up!
You need to had your details into the left side Boxes making sure to remove (click here, delete and put your own!)first, and click on Generate.⌁
username: Eg: username:
Database password: Eg: Database password:
@cluster0:xxxxx E.g: cluster0.xxxxx
Database Name: E.g: Database Name:
mongodb+srv://
:
@cluster0..mongodb.net/ ?retryWrites=true&w=majority
E. After you have generated it, yours should be looking somthing similar to the one below. Mine might be a little different to what yours should be so do check it carefully, and make sure to copy and paste it into notepad like I will show you in the video below
My Connection String results⌁
mongodb+srv://nightkai:Madeuppassword7@cluster0.j2iil.mongodb.net/kdatabase?retryWrites=true&w=majority

| Warning! |
| Keep this string safely aside, it is called your MONGODB_URI |
| video demo of getting connection string, |
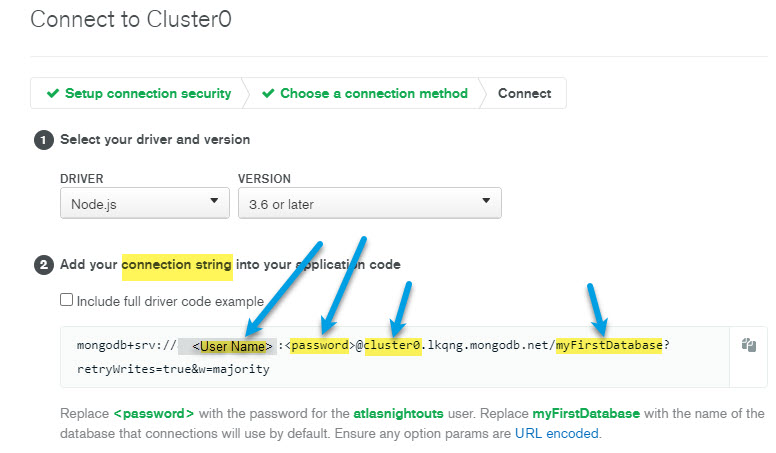
a) If you want to do it manually: replace

** Another example for you below!**⌁
| Note! |
| There are no < and > characters in the final string, neither for password nor for database name. |
Now we need to do
⌁
Part 4: Fork and Deploy cgm remote monitory ⌁
Issues or Concerns⌁
If you have any issues or concerns please post your questions in the ⌁
 Facebook Group or you can go to the Discussions on Github
![]()
