
BASE_URL⌁
xdrip+ Base_URL
⌁
1. Set up xDrip to upload to your Nightscout
⌁
This is what you need to do in xDrip on your master (Main) phone.
a. Go to xDrip Settings −> Cloud Upload −> Nightscout Sync (REST-API)
⌁
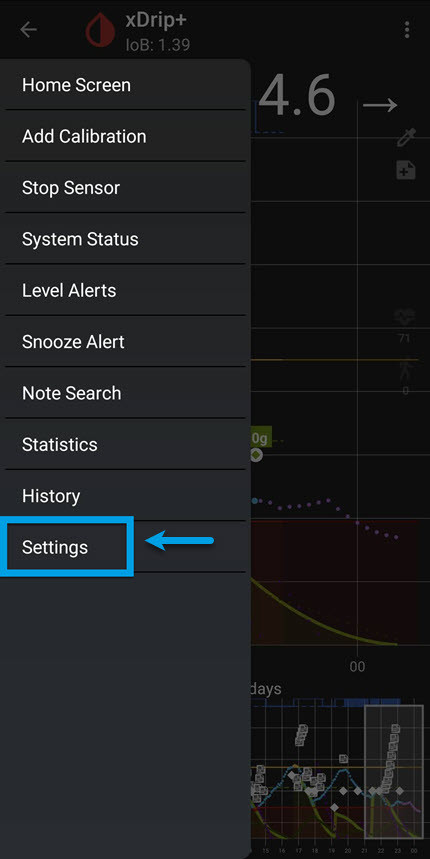
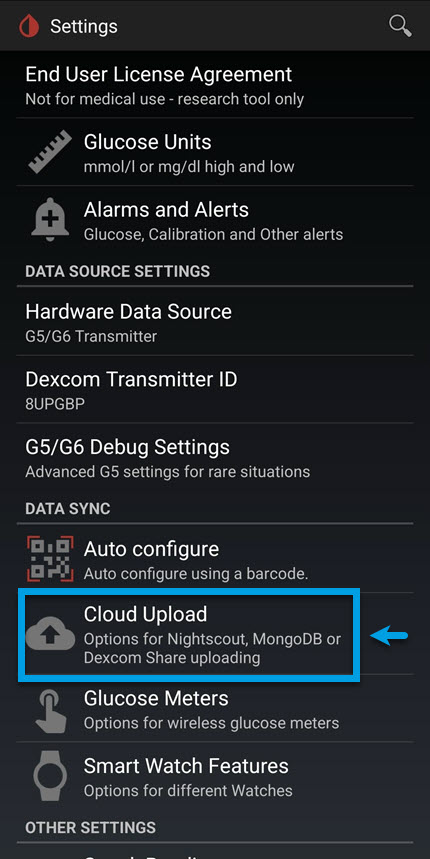
.jpg)
b. Select Enable at the top, if not already enabled.
⌁
.jpg)
c. Tap on Base URL. Enter the following Url. Remeber yours will be different than what I show you here. You will need to add your Secret-API and your Host to the set out code!⌁
https://ThisIsyourSecret-API@thisisyourHostName/api/v1/
If you forgot or lose your secret-API it can be located at Heroku/ Settings/Config Vars and look down the list for API_SECRET
This will now be located in a differrent place now within Fly_io
Your Host name is located if using Heroku at Heroku/Settings/ and scroll down to the bottom.

Or you can click on the Open app in your Heroku acount at the top of your screen and copy the url from the browser.

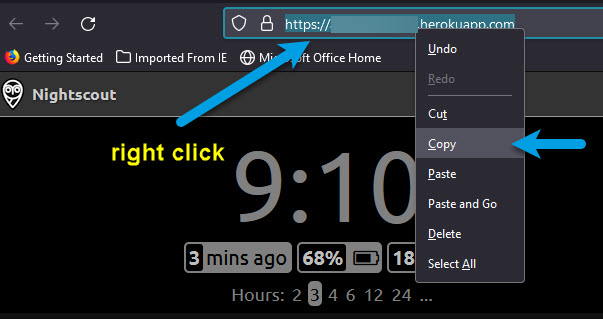
Your Host name is located if using Fly_io its in your Fly_io Dashboard.

d. (Reminder)Tap on Base URL. Enter the following. https://API-Secret@hostname/api/v1/
⌁
That’s it. Your xDrip readings should now upload to your Nightscout web site.
If you do not see levels after 5 mins, triple check the way you have added your Base URL correctly, it is very case sensitive!with no spaces
AndroidAPS Base_URL⌁
1. **Set up AndroidAPS to go to your Fly_io or Heroku **
⌁
This is the same has above except your Url will be your web address for Fly_io Host address, not like xdrip's where it has Both Secret and Fly_io host on one line with the added api/v1 at the end of it
On AASP it is done seperatly, you add your Nightscout Web URL and then add your Secret in NS API secret below.There is no api/v1 in it
 Heroku
.jpg)
Adding a Follower⌁
1. Setting up xDrip as a (follower) for your dad⌁
This will be on your followers mobile phone, not your own.
a. In the xDrip Settings / Hardware Data Source, choose “Nightscout Follower” as the hardware data source.⌁


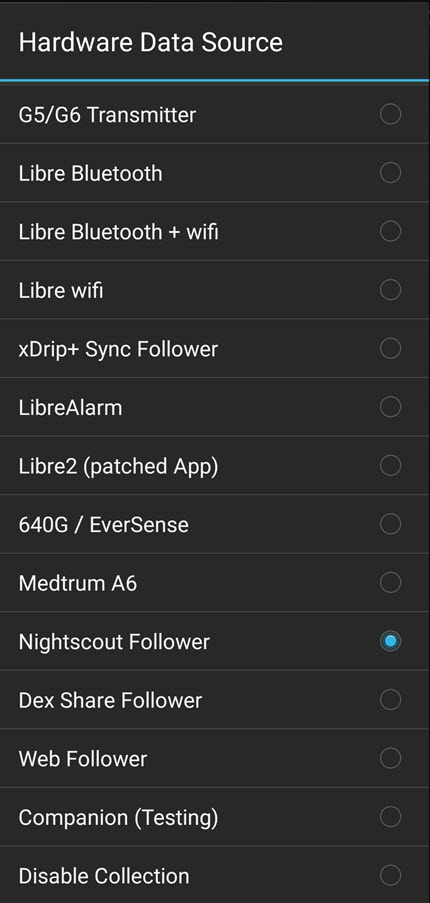
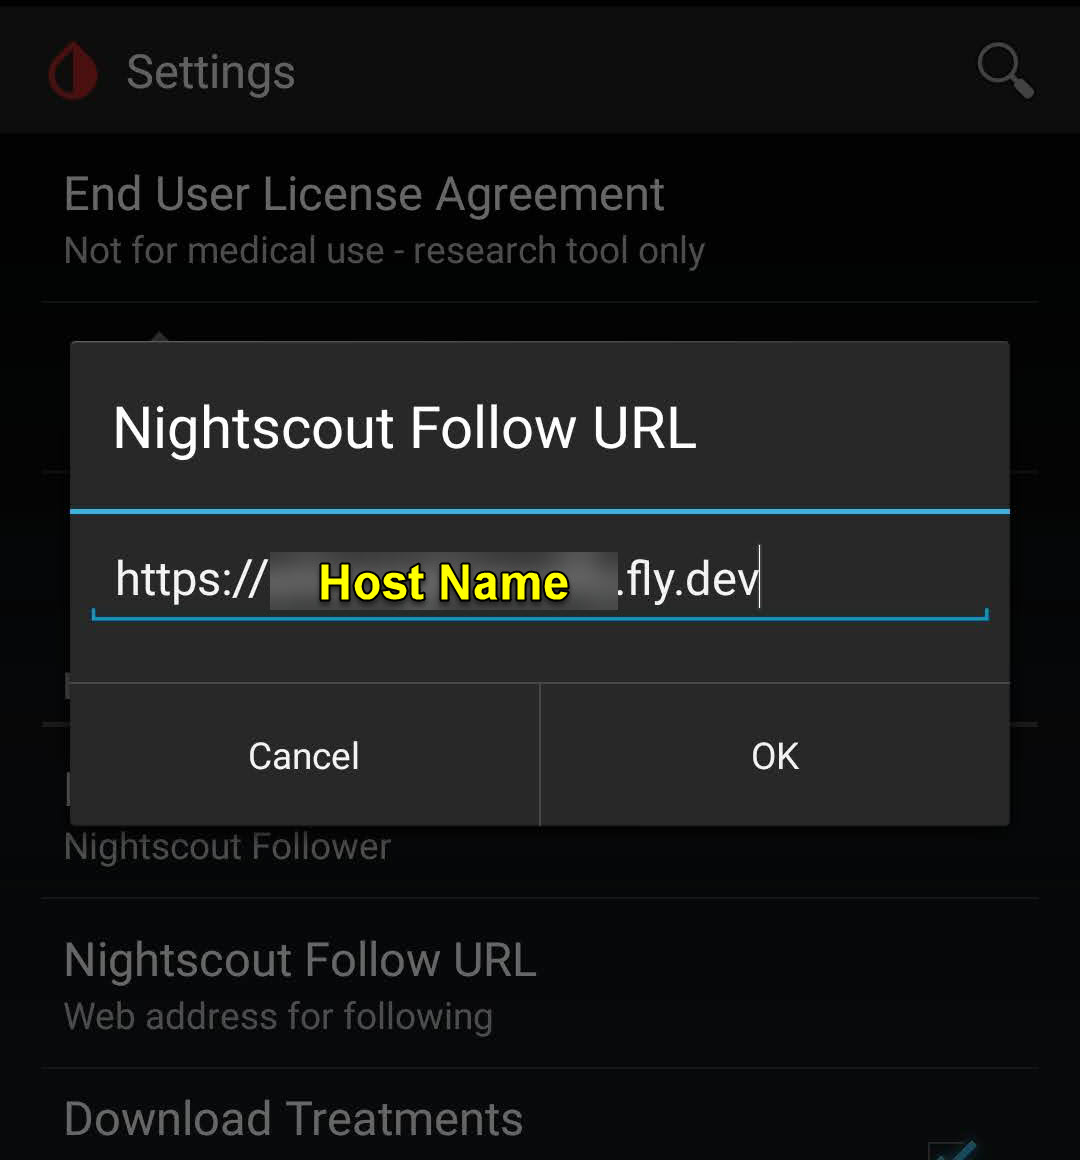
Under “Nightscout Follow URL”,
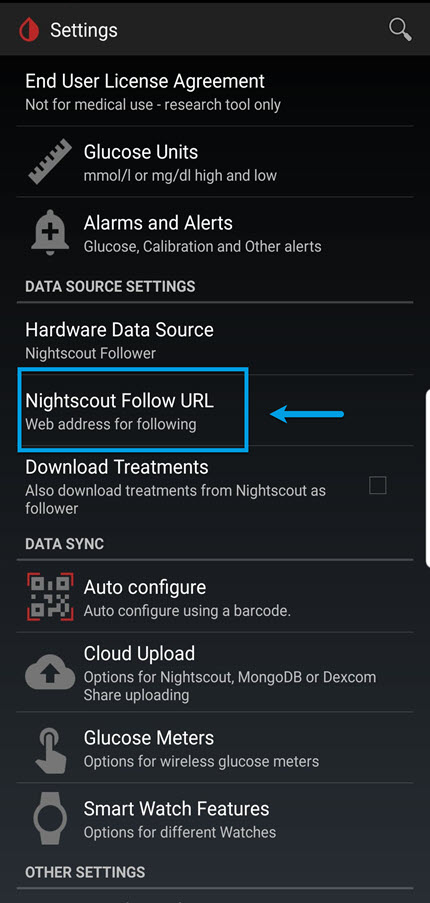
Fly_io
 Heroku
Add your Fly_io Host address into it or your Heroku Name URL depending on which one you are using.
This will only be setting up a follower, giving them the full URL Address but they will not have a Secret Password for it like yourself would have.
Token⌁
There are a few other ways to add followers and will be needing for you to setup a Token in Nightscout admin section.
You can also add a Token and email it to one of your follows.
1. Make a Token
⌁
Click the 'Add New Subject'

a. In the form that opens, enter a name. Then under “Roles”, copy a role from the table. For example, for your dad that is only supposed to see your readings and nothing else and not be able to enter any other details or do anything else, then enter 'readable' in the roles section.
⌁
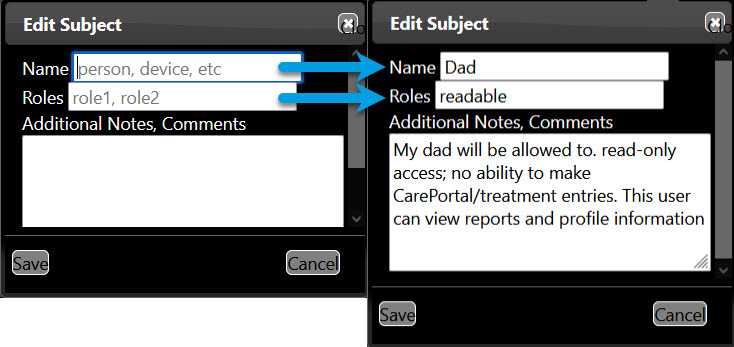
You can enter a combination of different roles by separating them with “,”
You can also add an optional comment if you like, and then click the save button.
b. The token will be displayed at the top. You can use it now to give to your follower:
⌁

| Note! |
| Now make sure to take a note of the access token, that you are given. You can create multiple tokens with specific permissions for each. |
c. You will need to copy the Token URL from the top, by right clicking it and copy the Link. see video!
⌁
Copy Access Token Nightscout for Follower Pt1 Video⌁
Now email the person who is to follow you, and paste the URL into the email, and send it to them. They can now add it to there xdrip+ and have a Nightscout Desktop Icon on there Desktop for easy access to Nightscout.
They will need to go to there Settings/Nightscout Follow URL to do that.
Adding Follower email Token into Xdrip Pt2 Video⌁
Adding Nightscout to your Mobile Desktop Pt3 Video⌁
⌁
Issues or Concerns⌁
If you have any issues or concerns please post your questions in the
 Facebook Group or you can go to the Discussions on Github
![]()
